1. Create an account on Tagada
The first step in connecting Tagada is to create an account on the website of our app.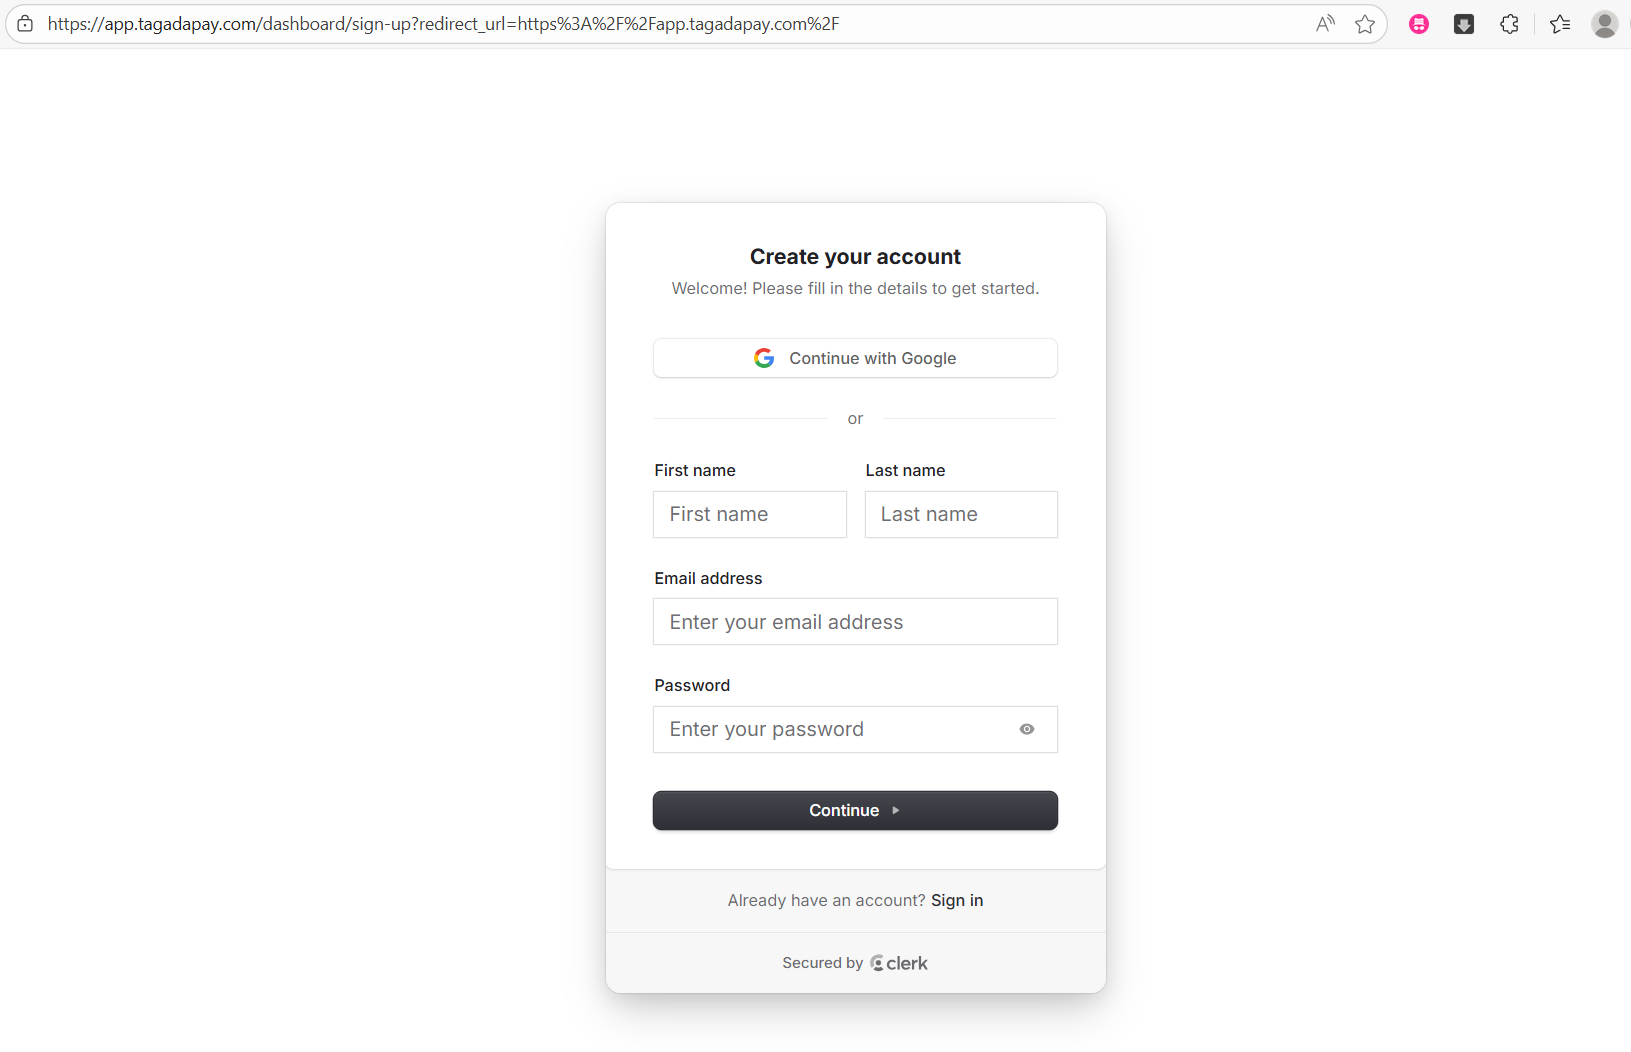
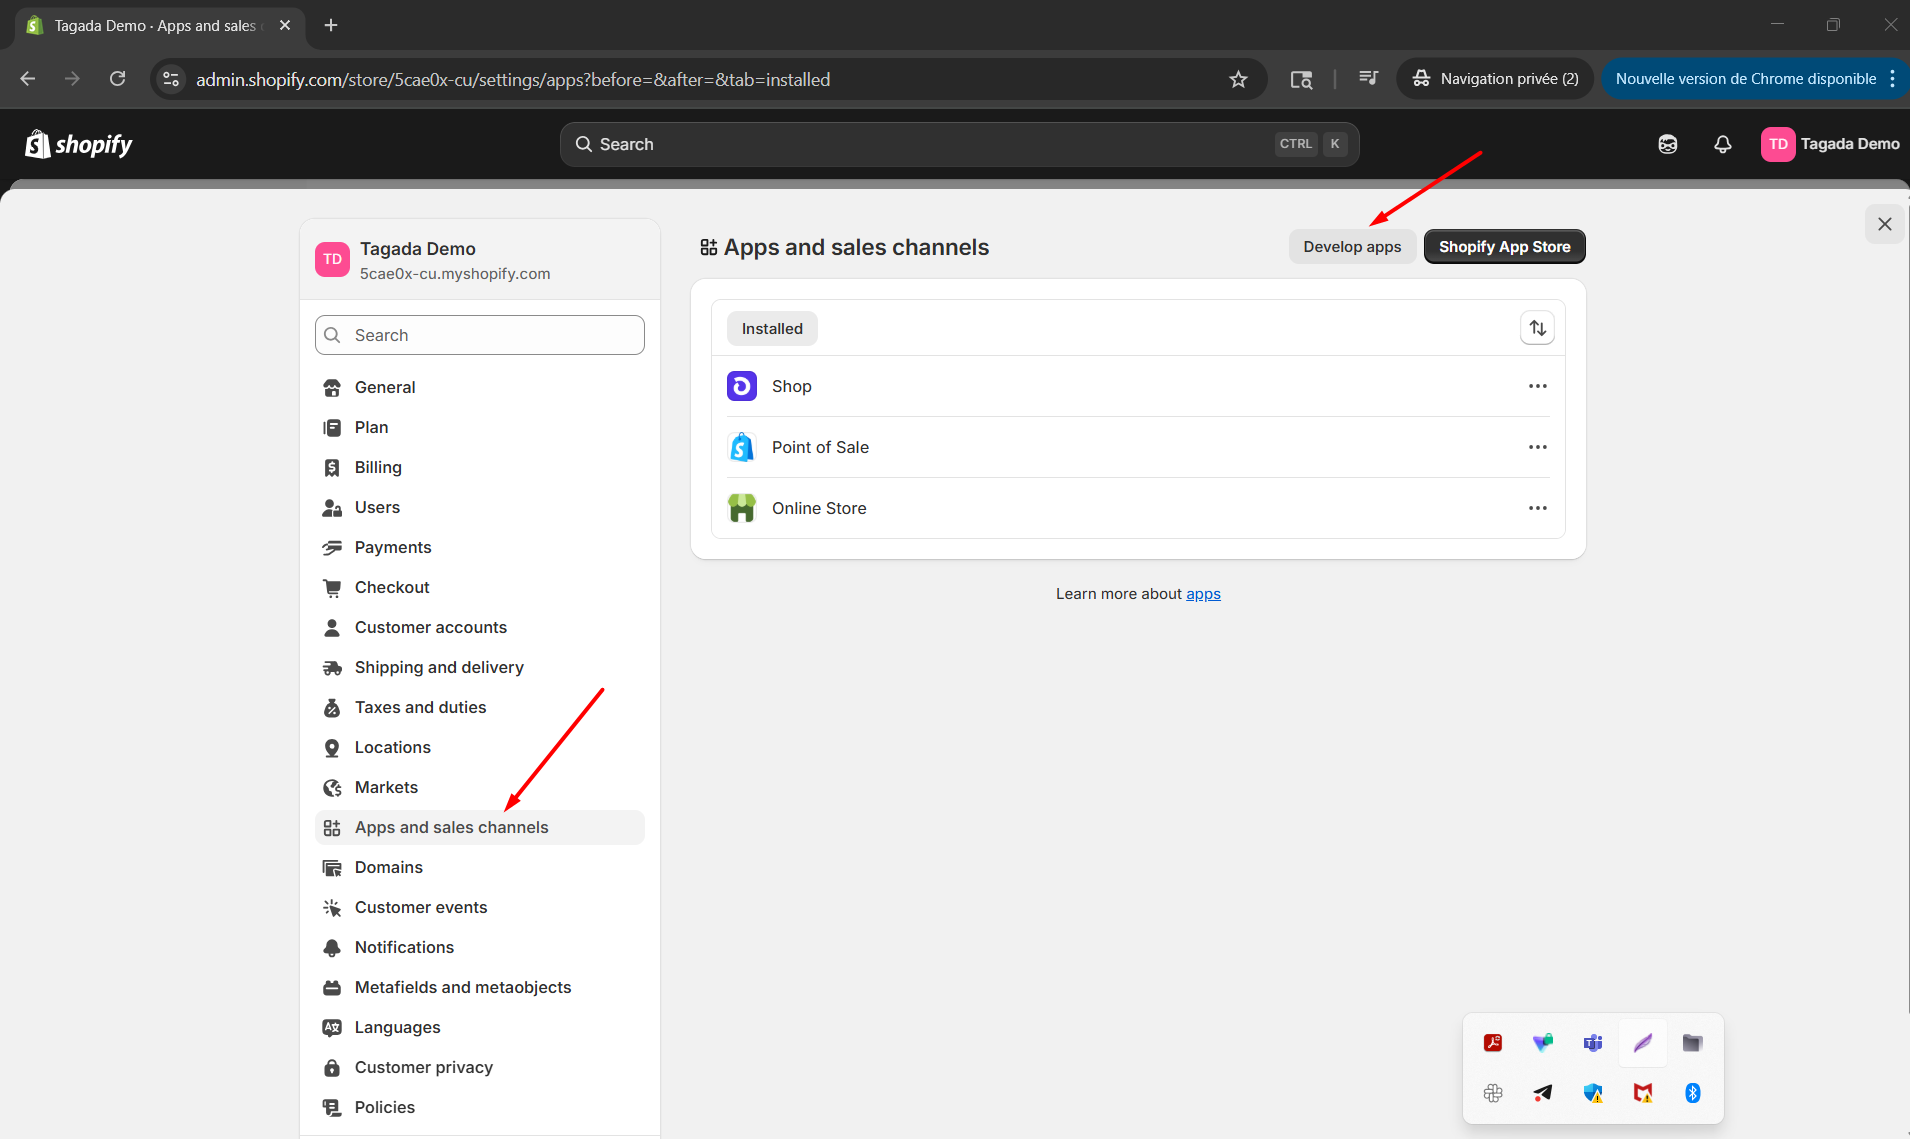
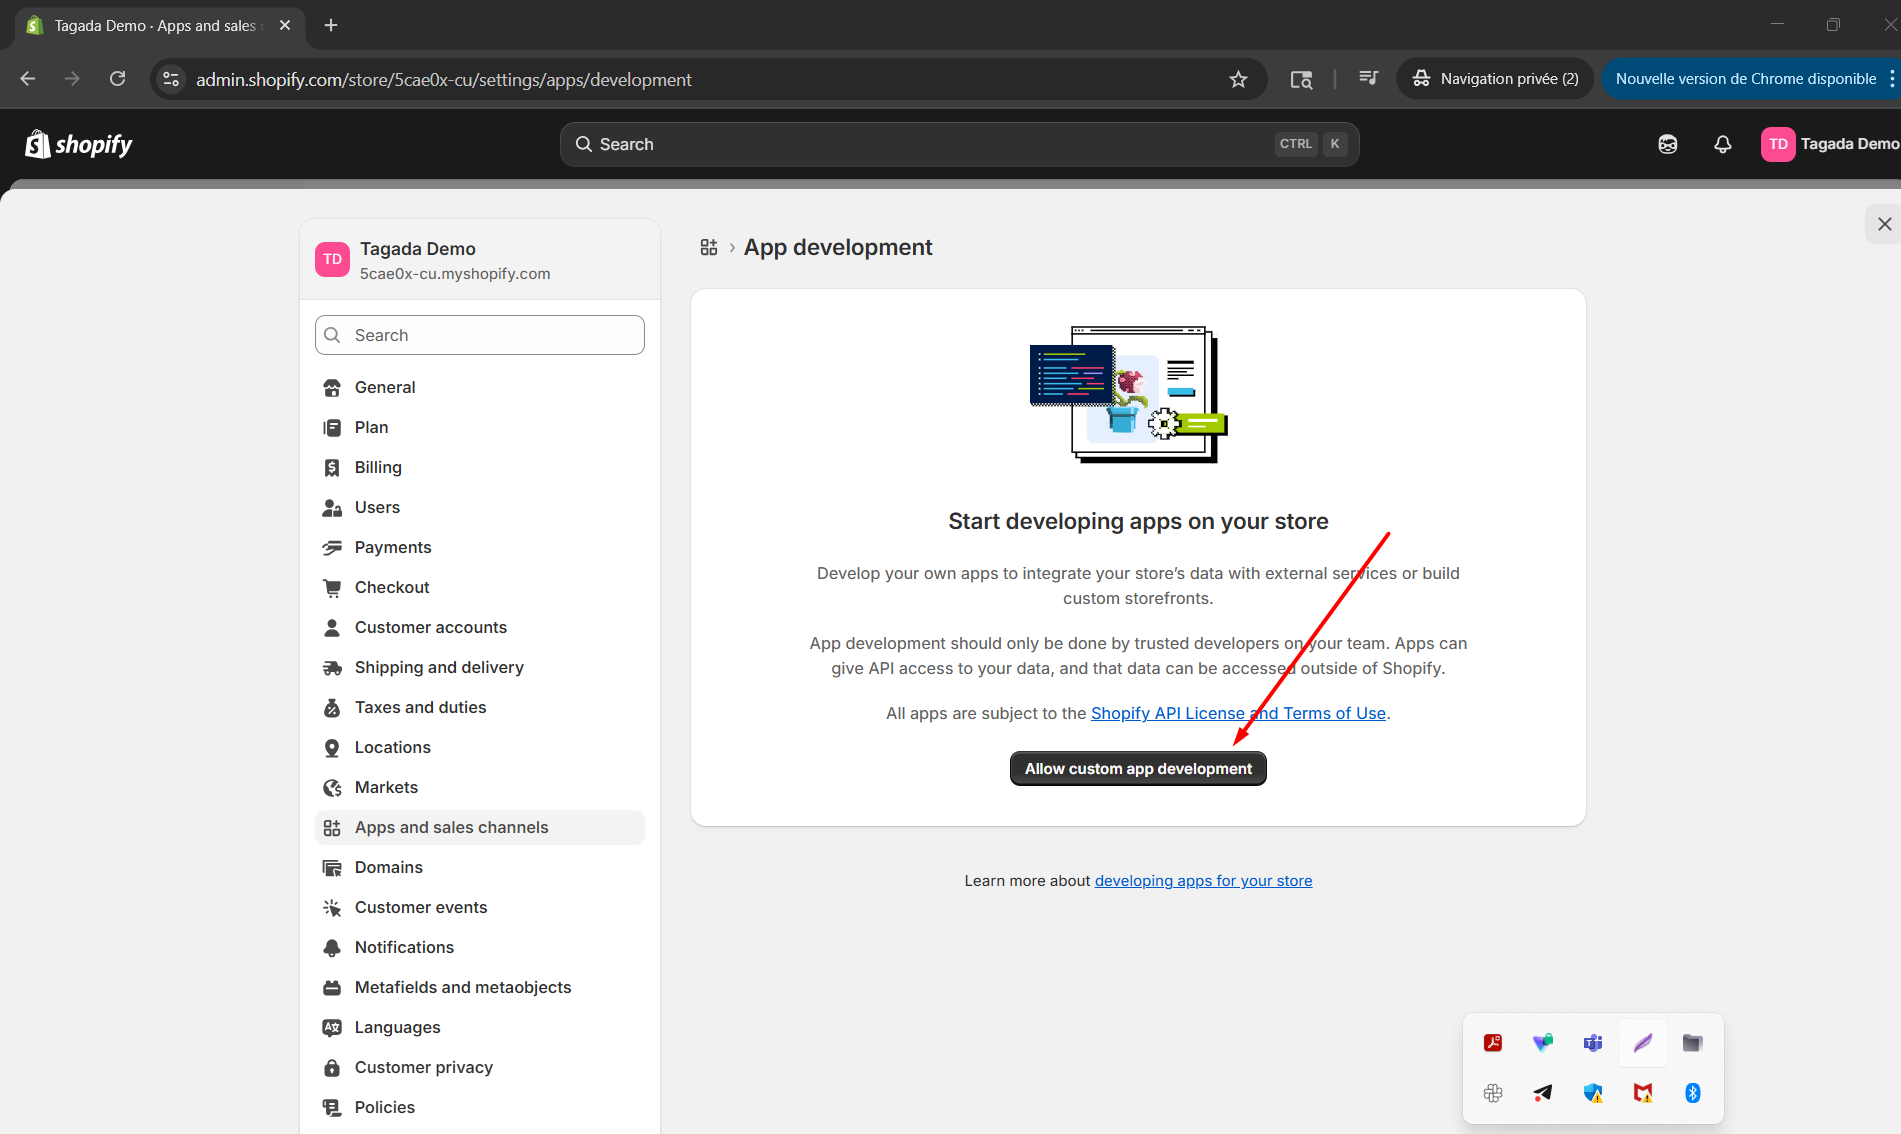
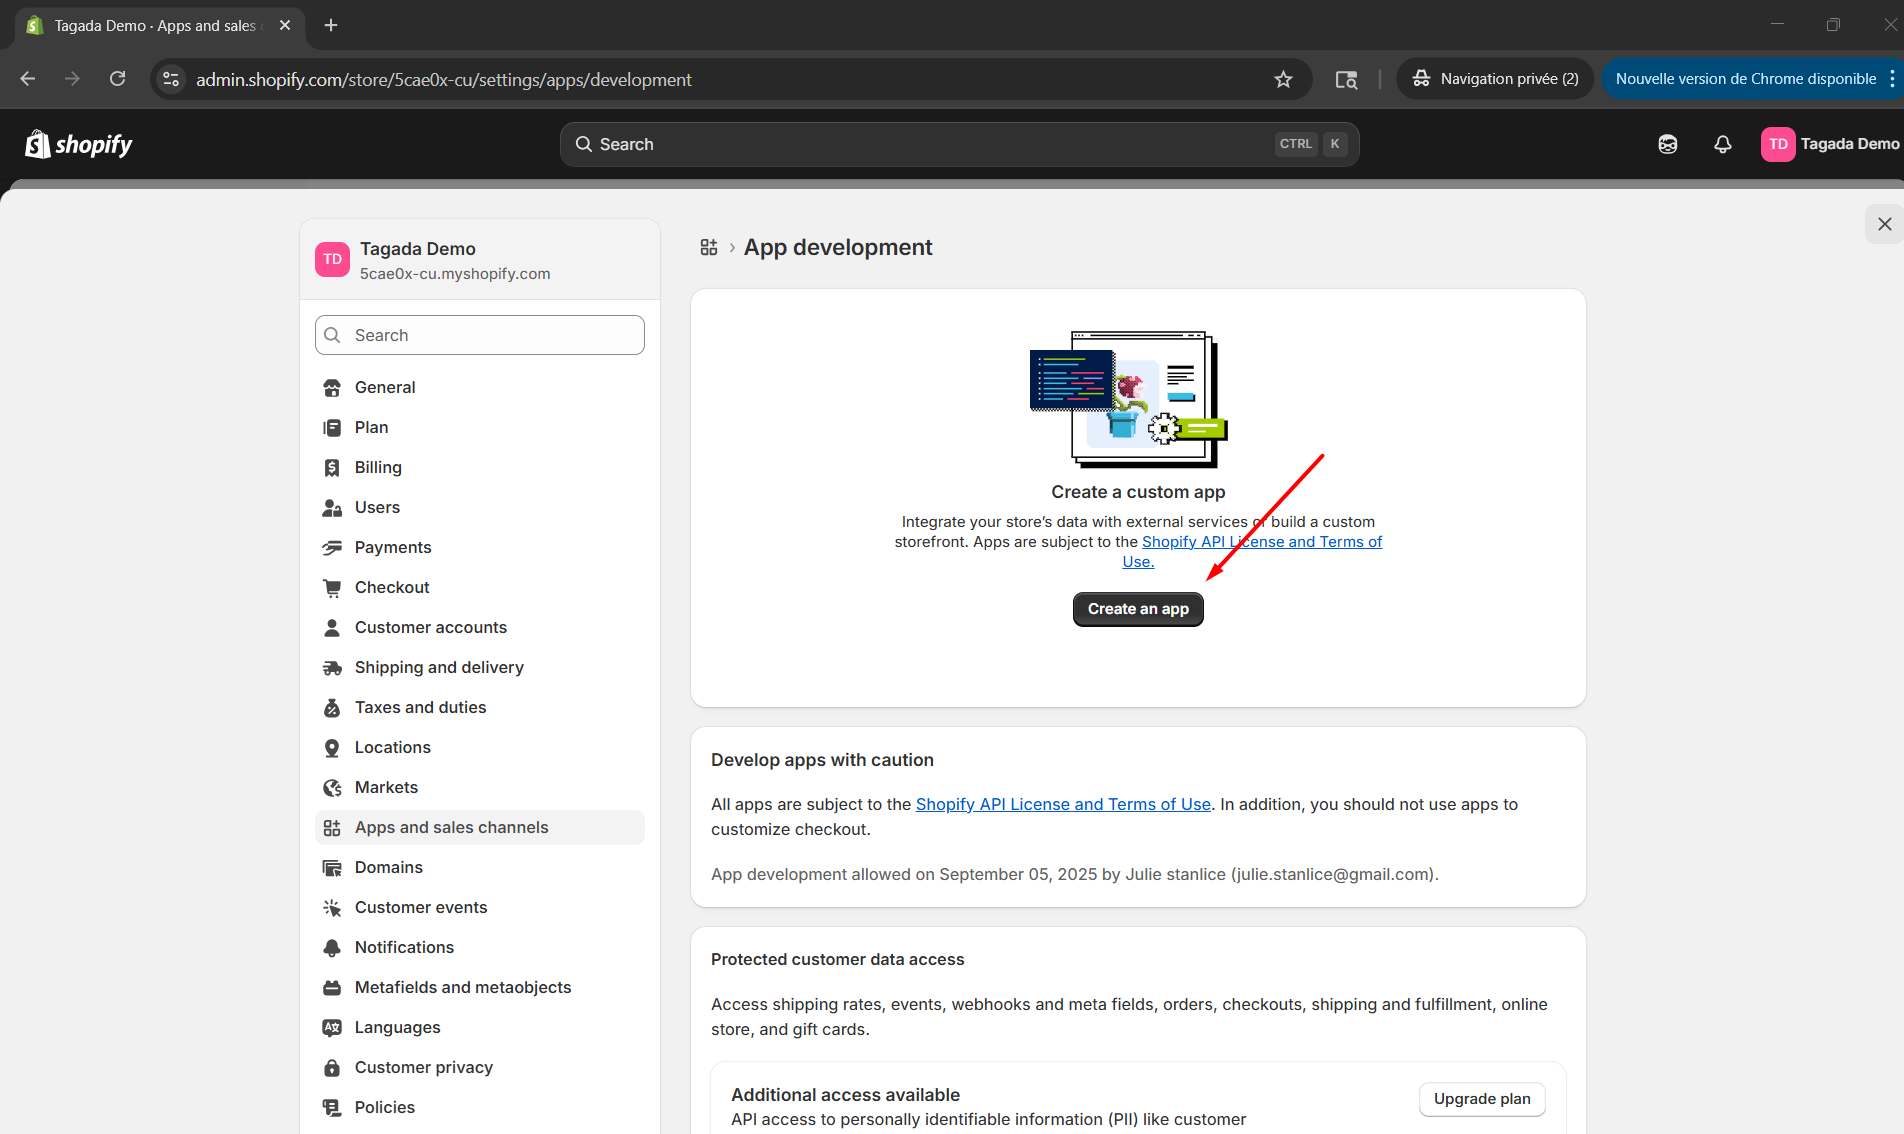
2. Activate “Develop Apps” in Shopify and Install
In your Shopify admin, go to Apps and sales channels (in Settings menu) > Develop apps

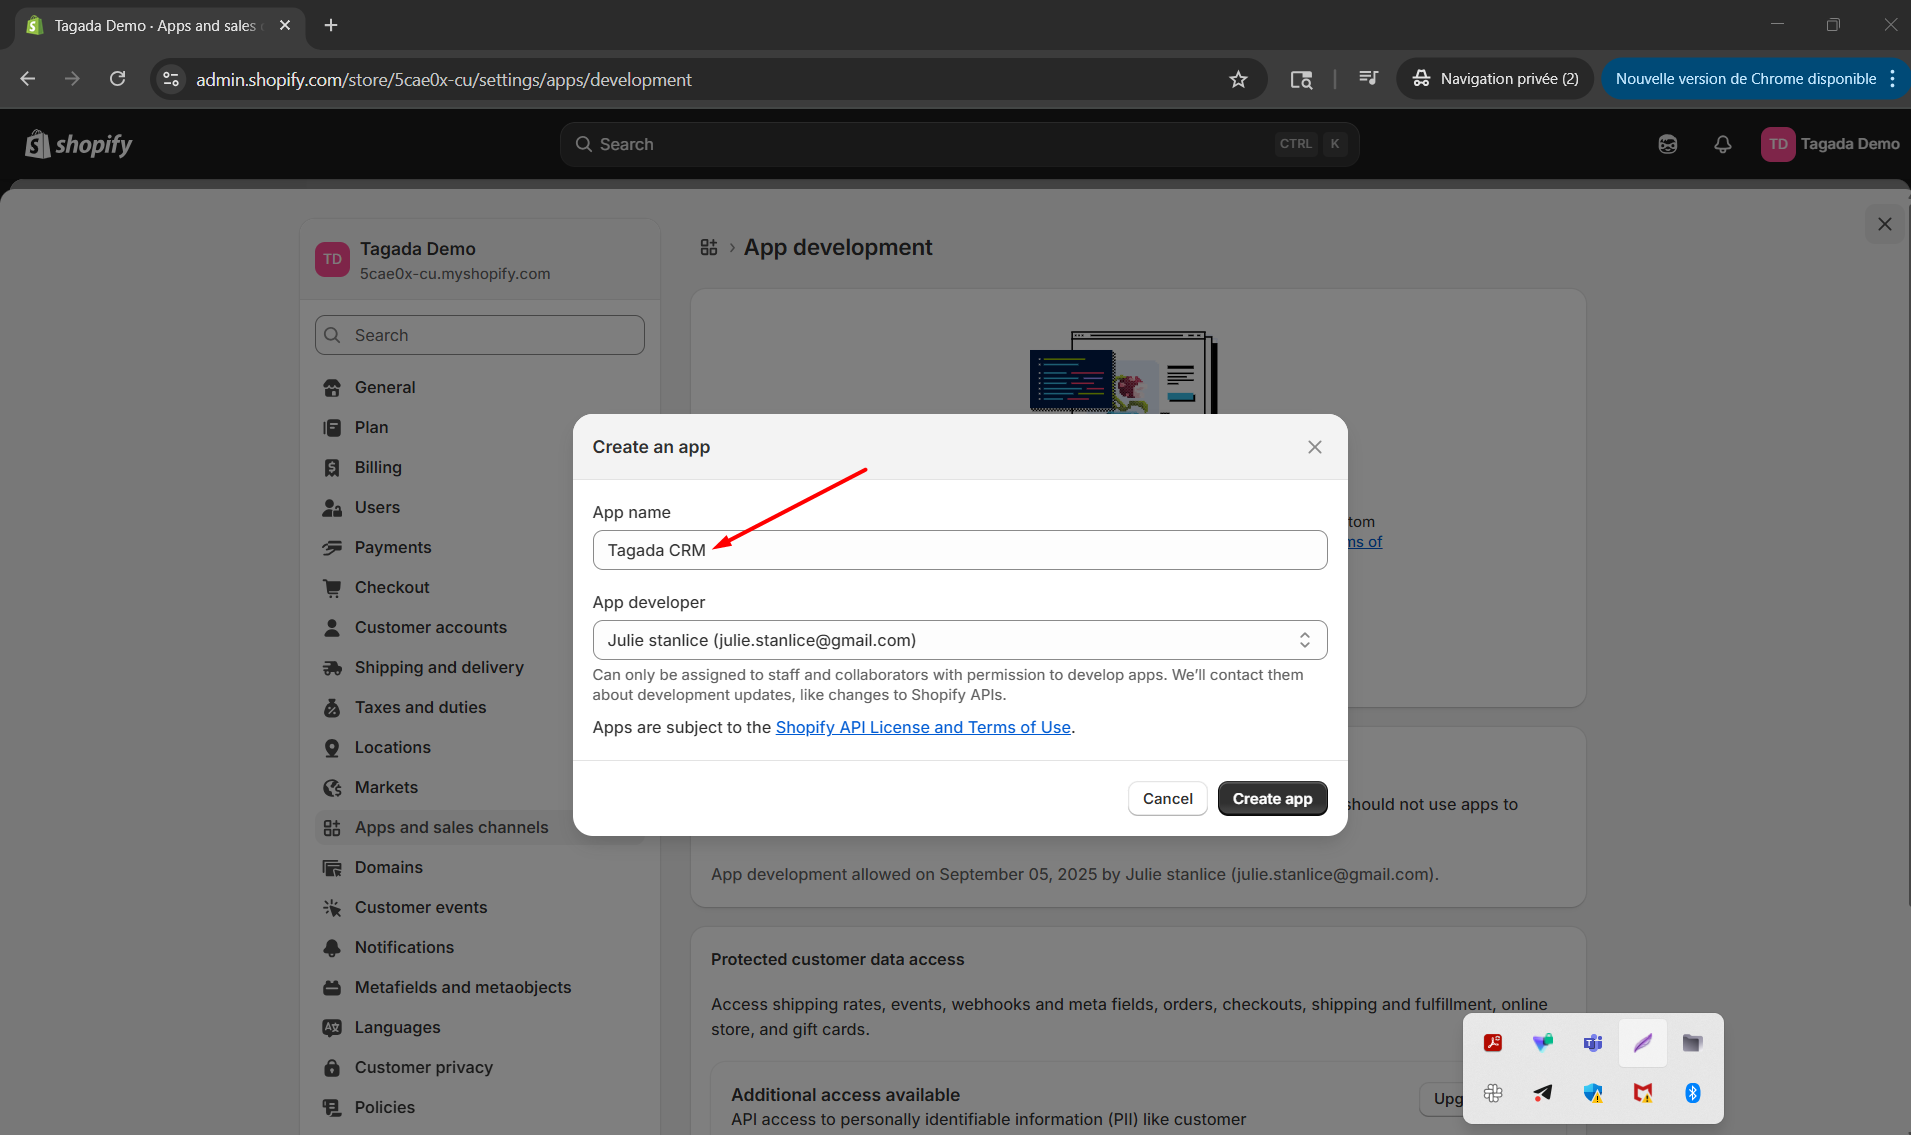
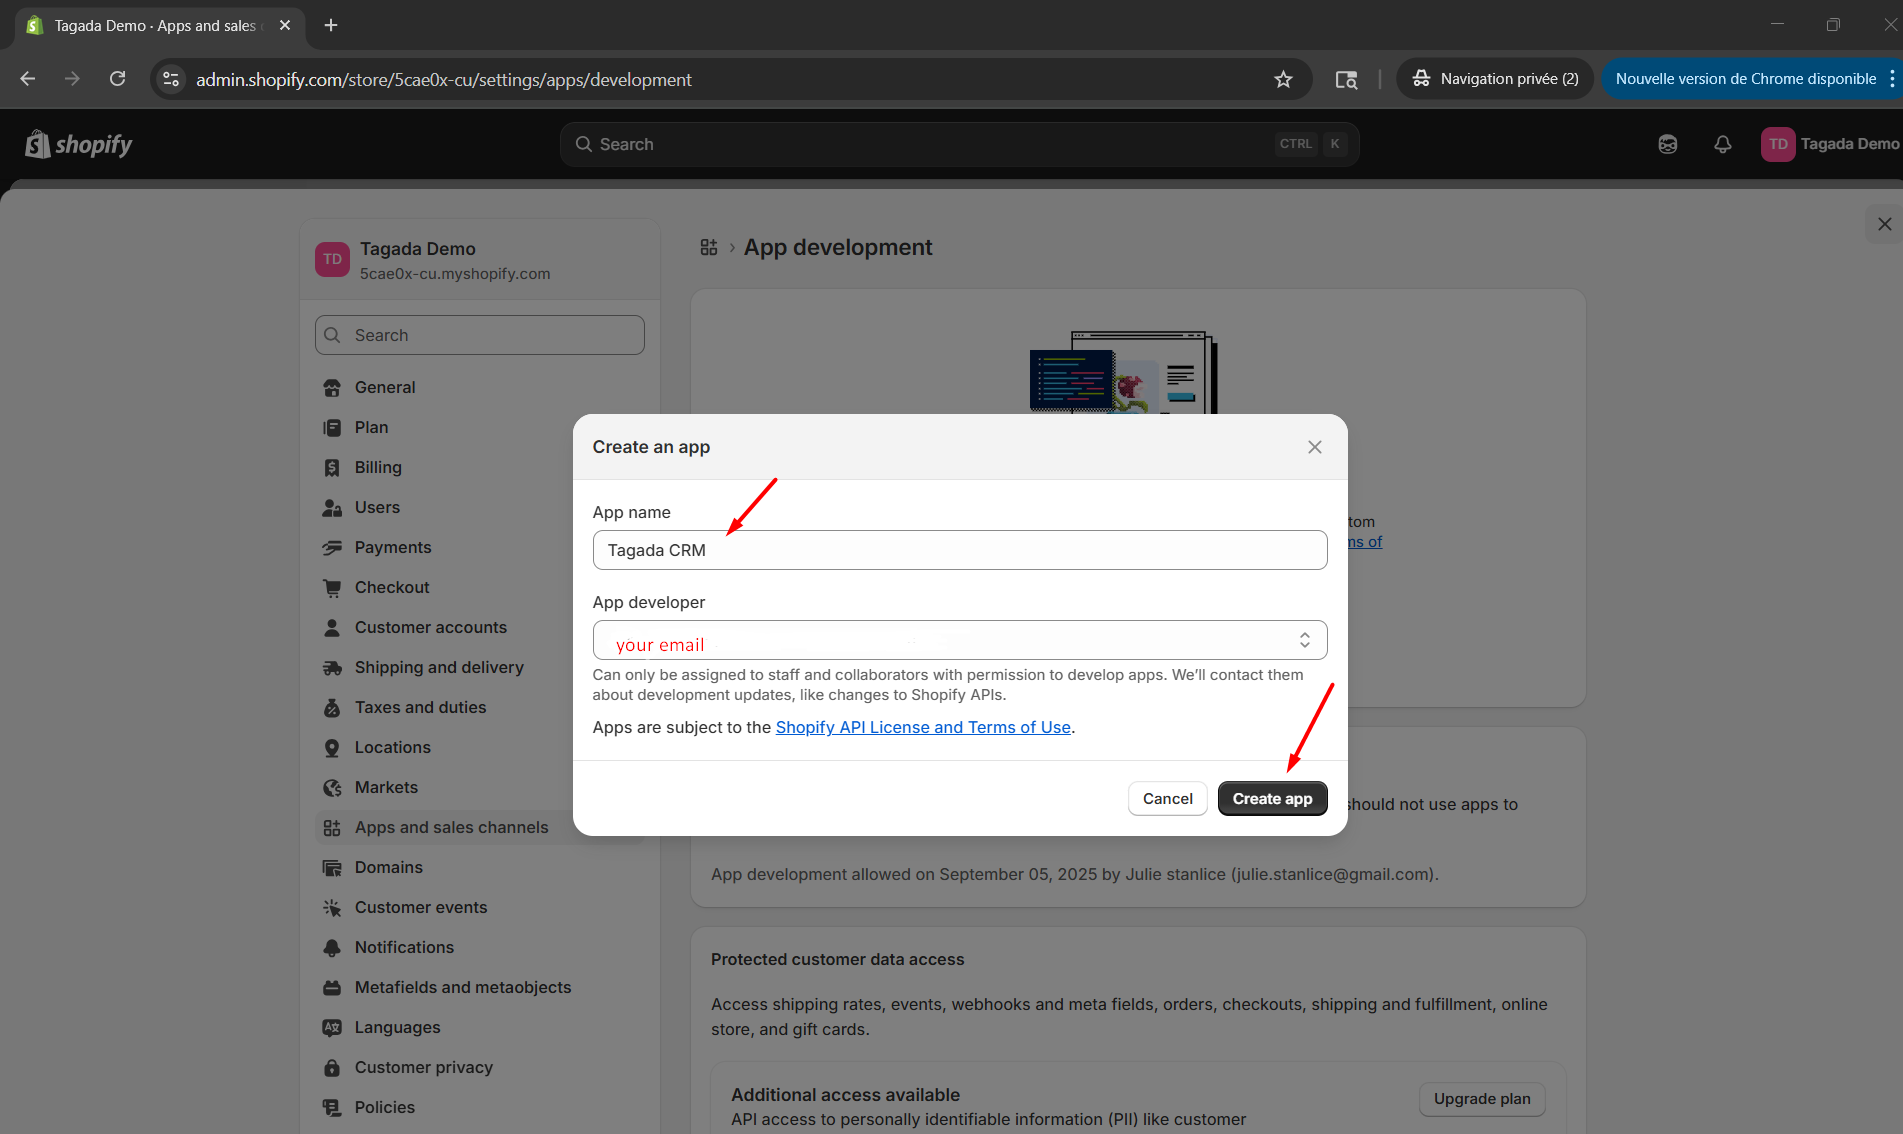
Give your app a name and select an email from the dropdown. Confirm by pressing the Create app button
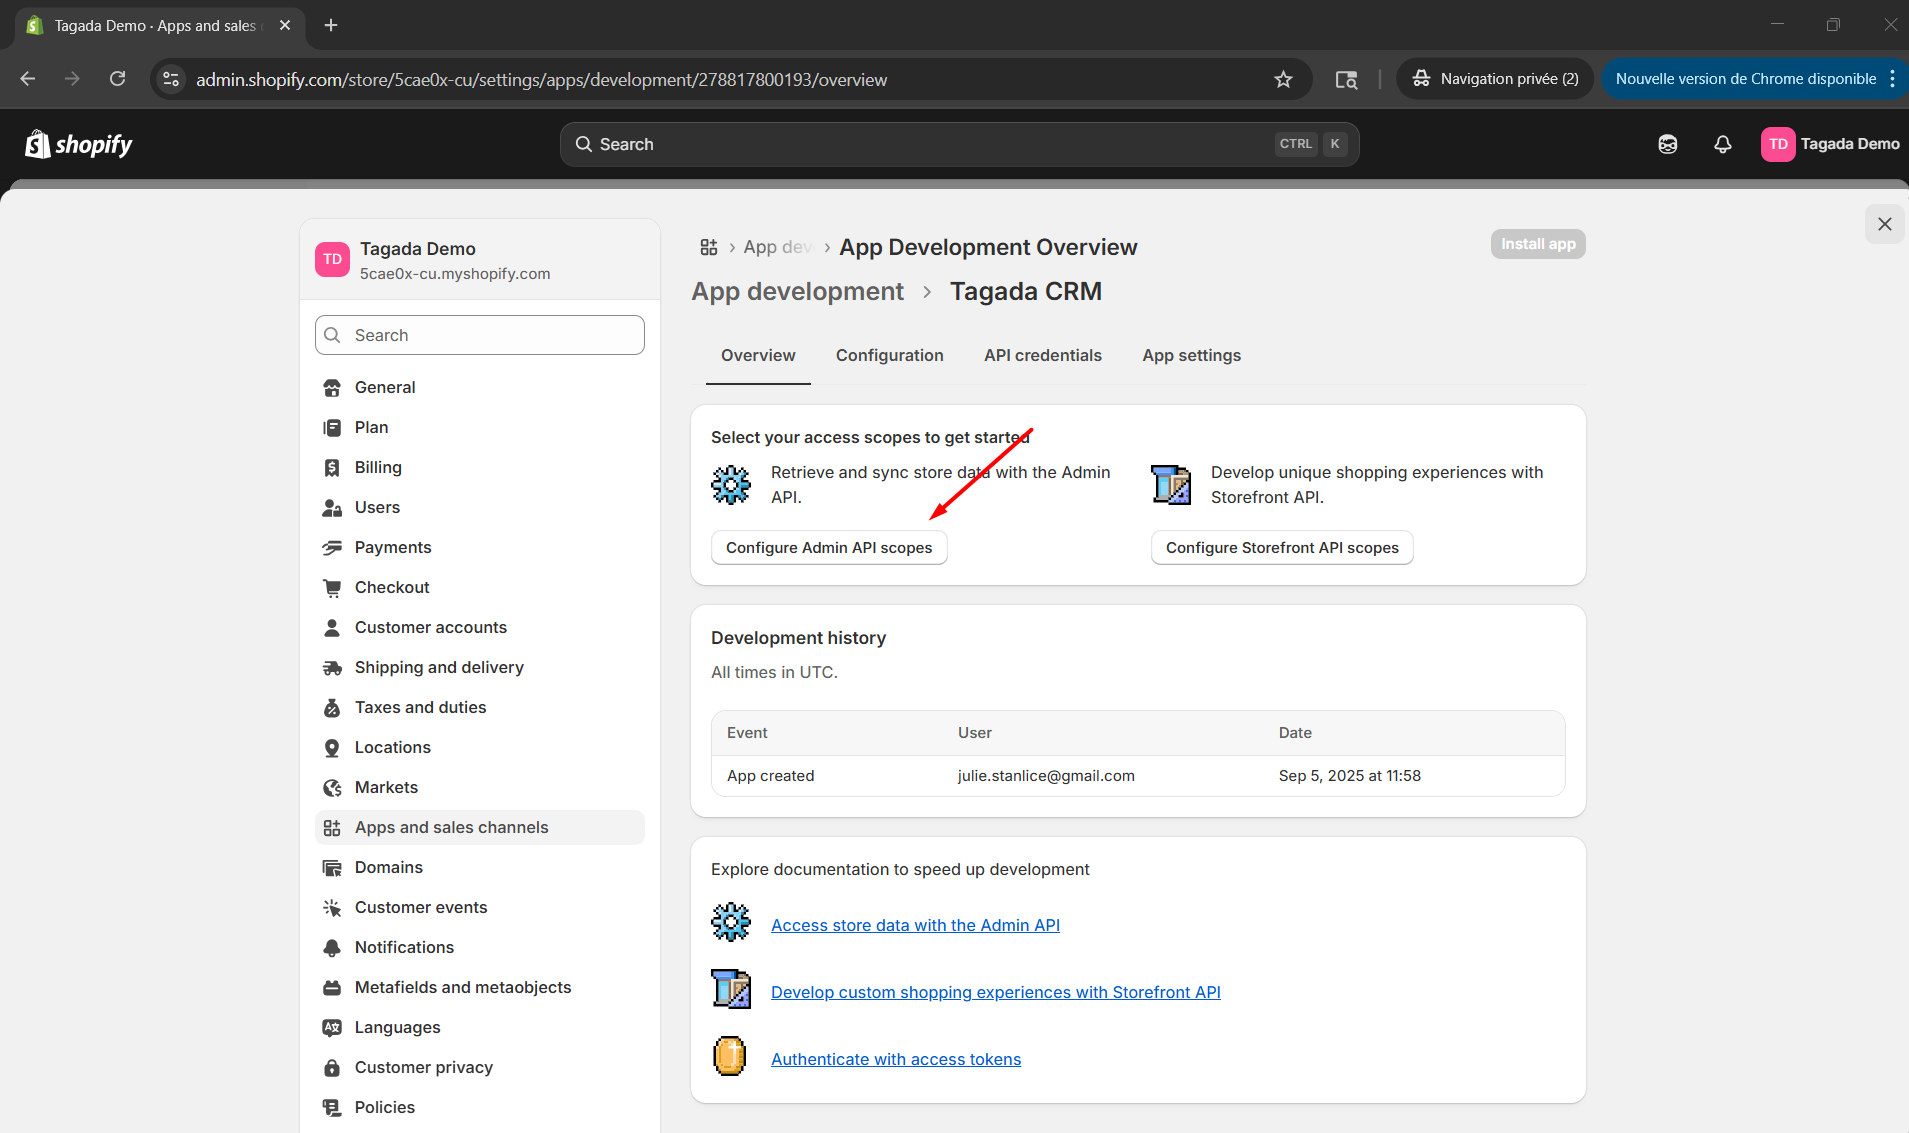
Enable the access (permissions) for the app in Admin API access scopes:
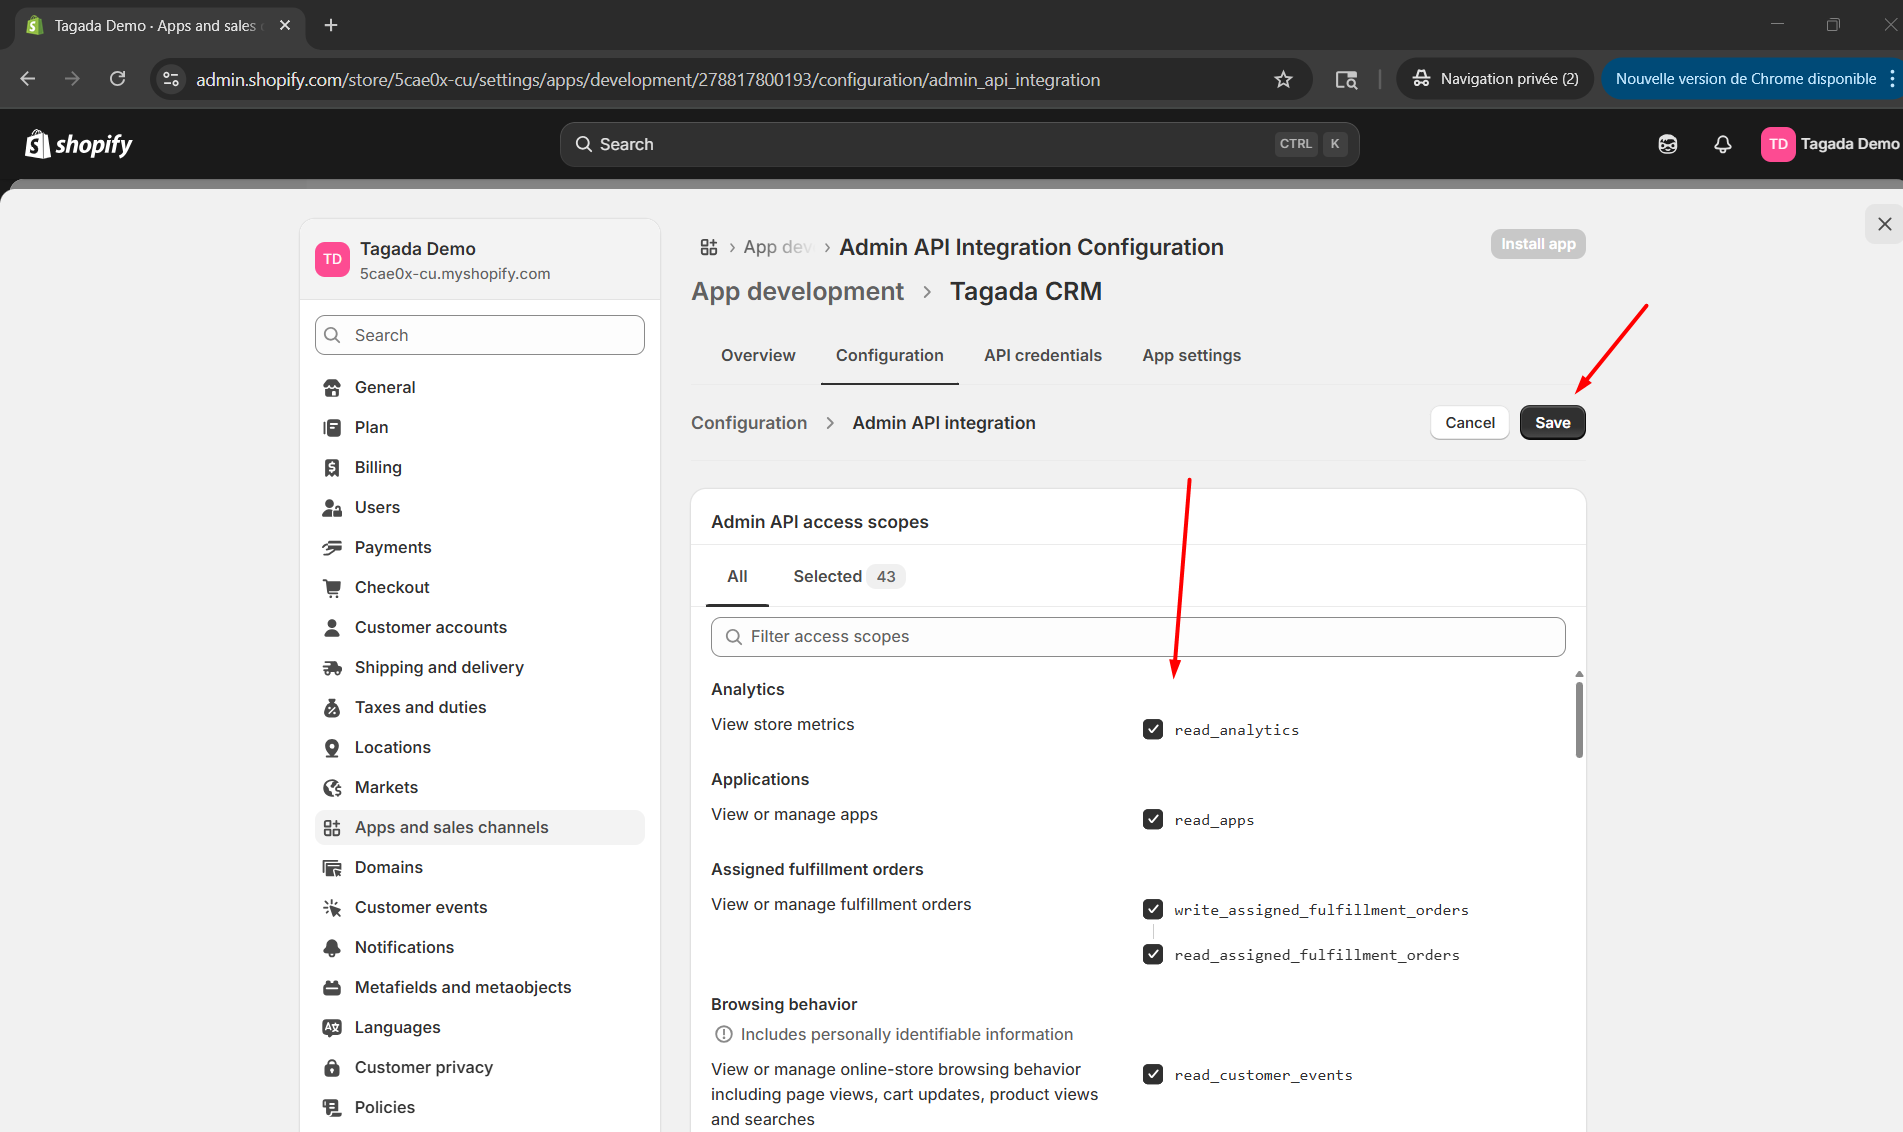
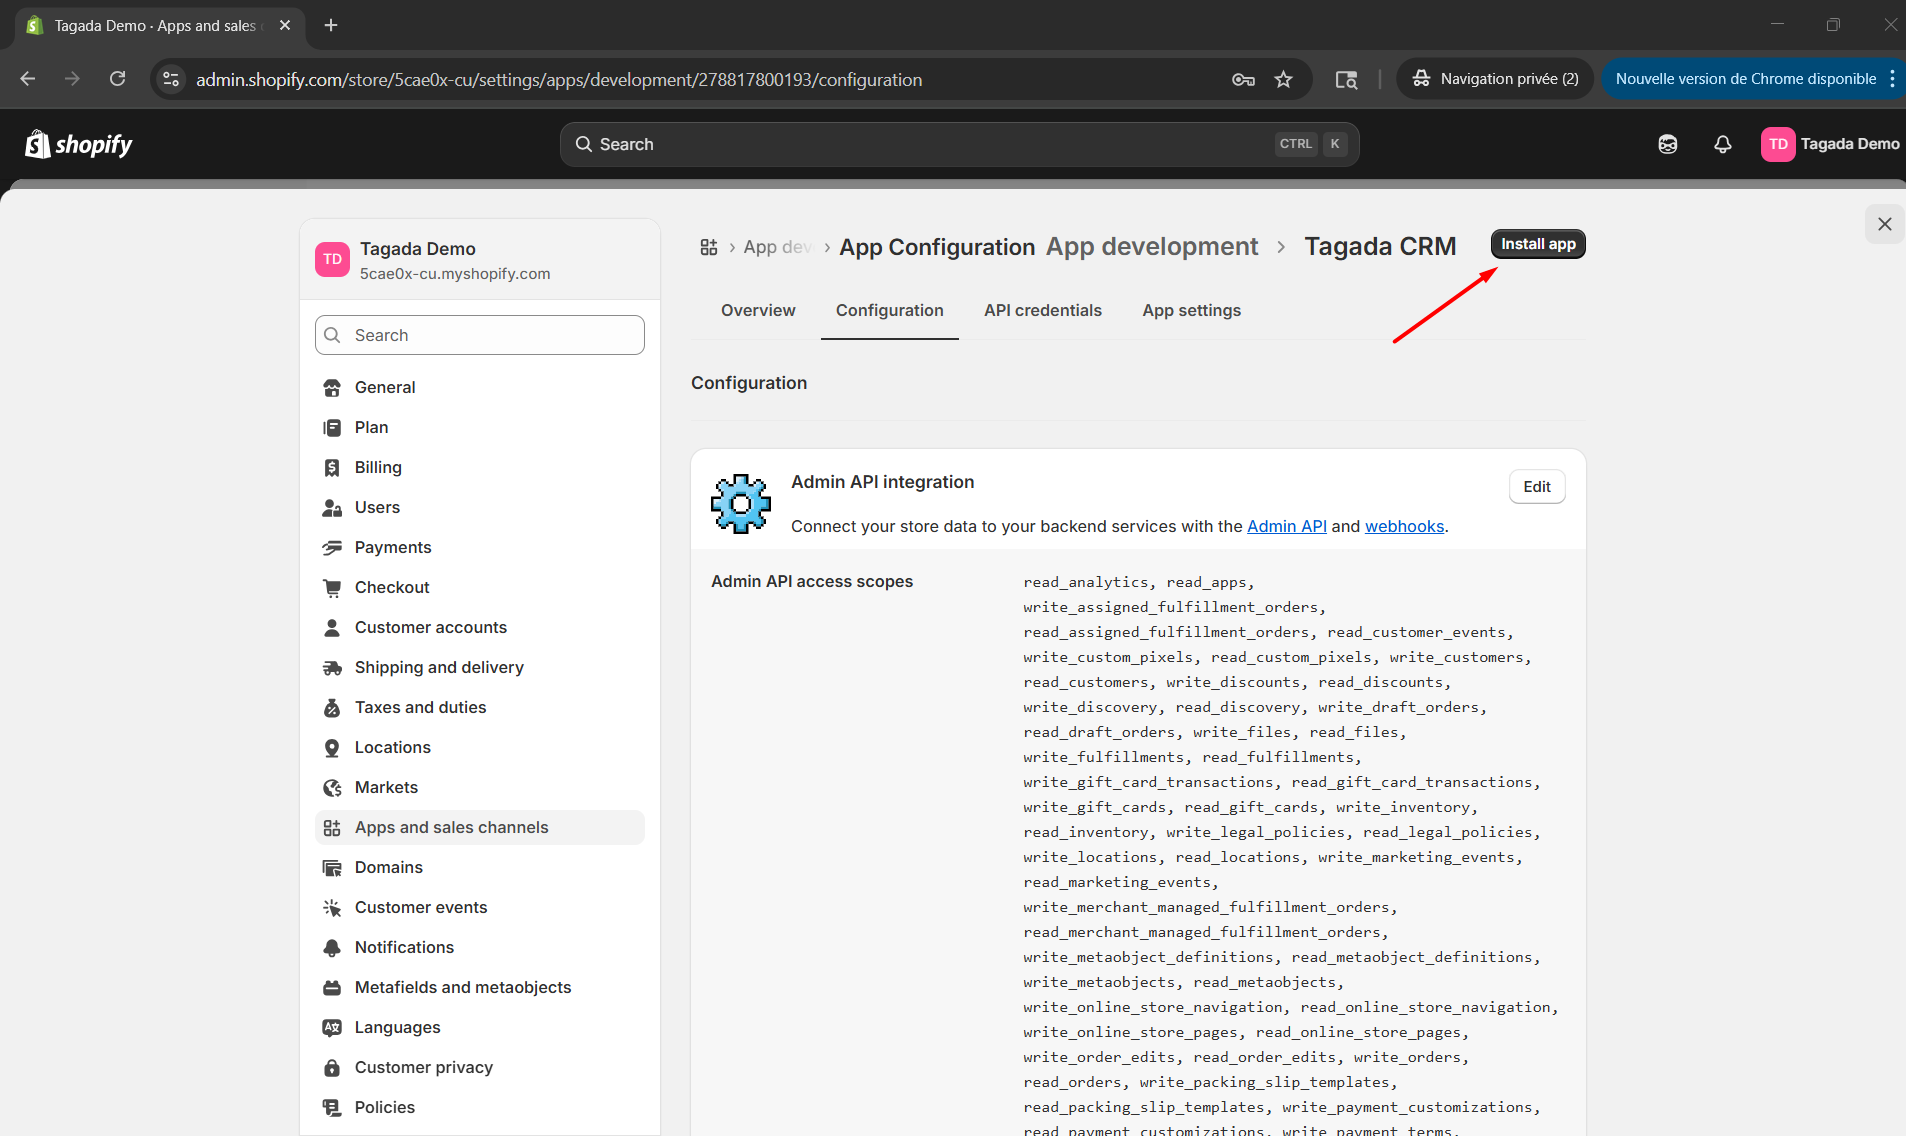
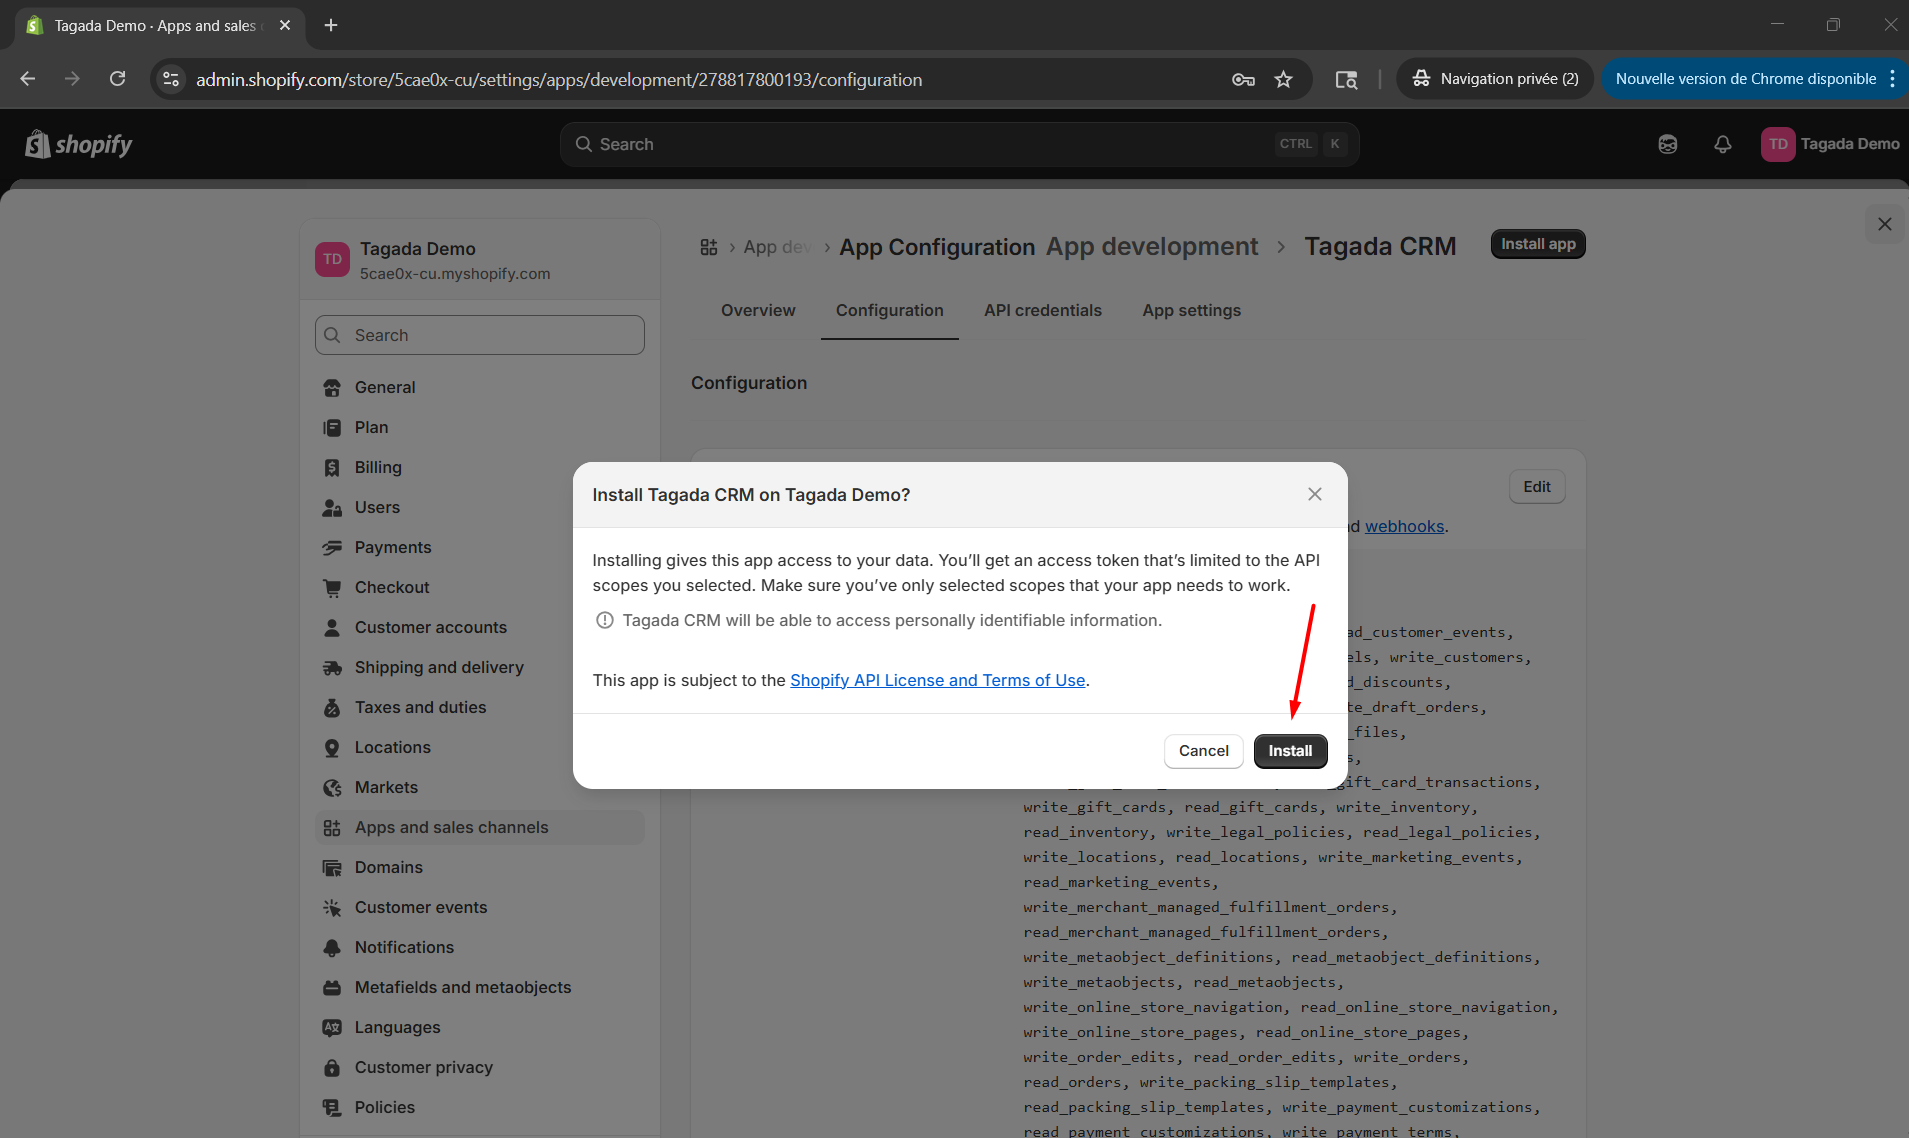
After giving the permissions, press the Install button on the Overview tab to get the access token unique for your new custom app
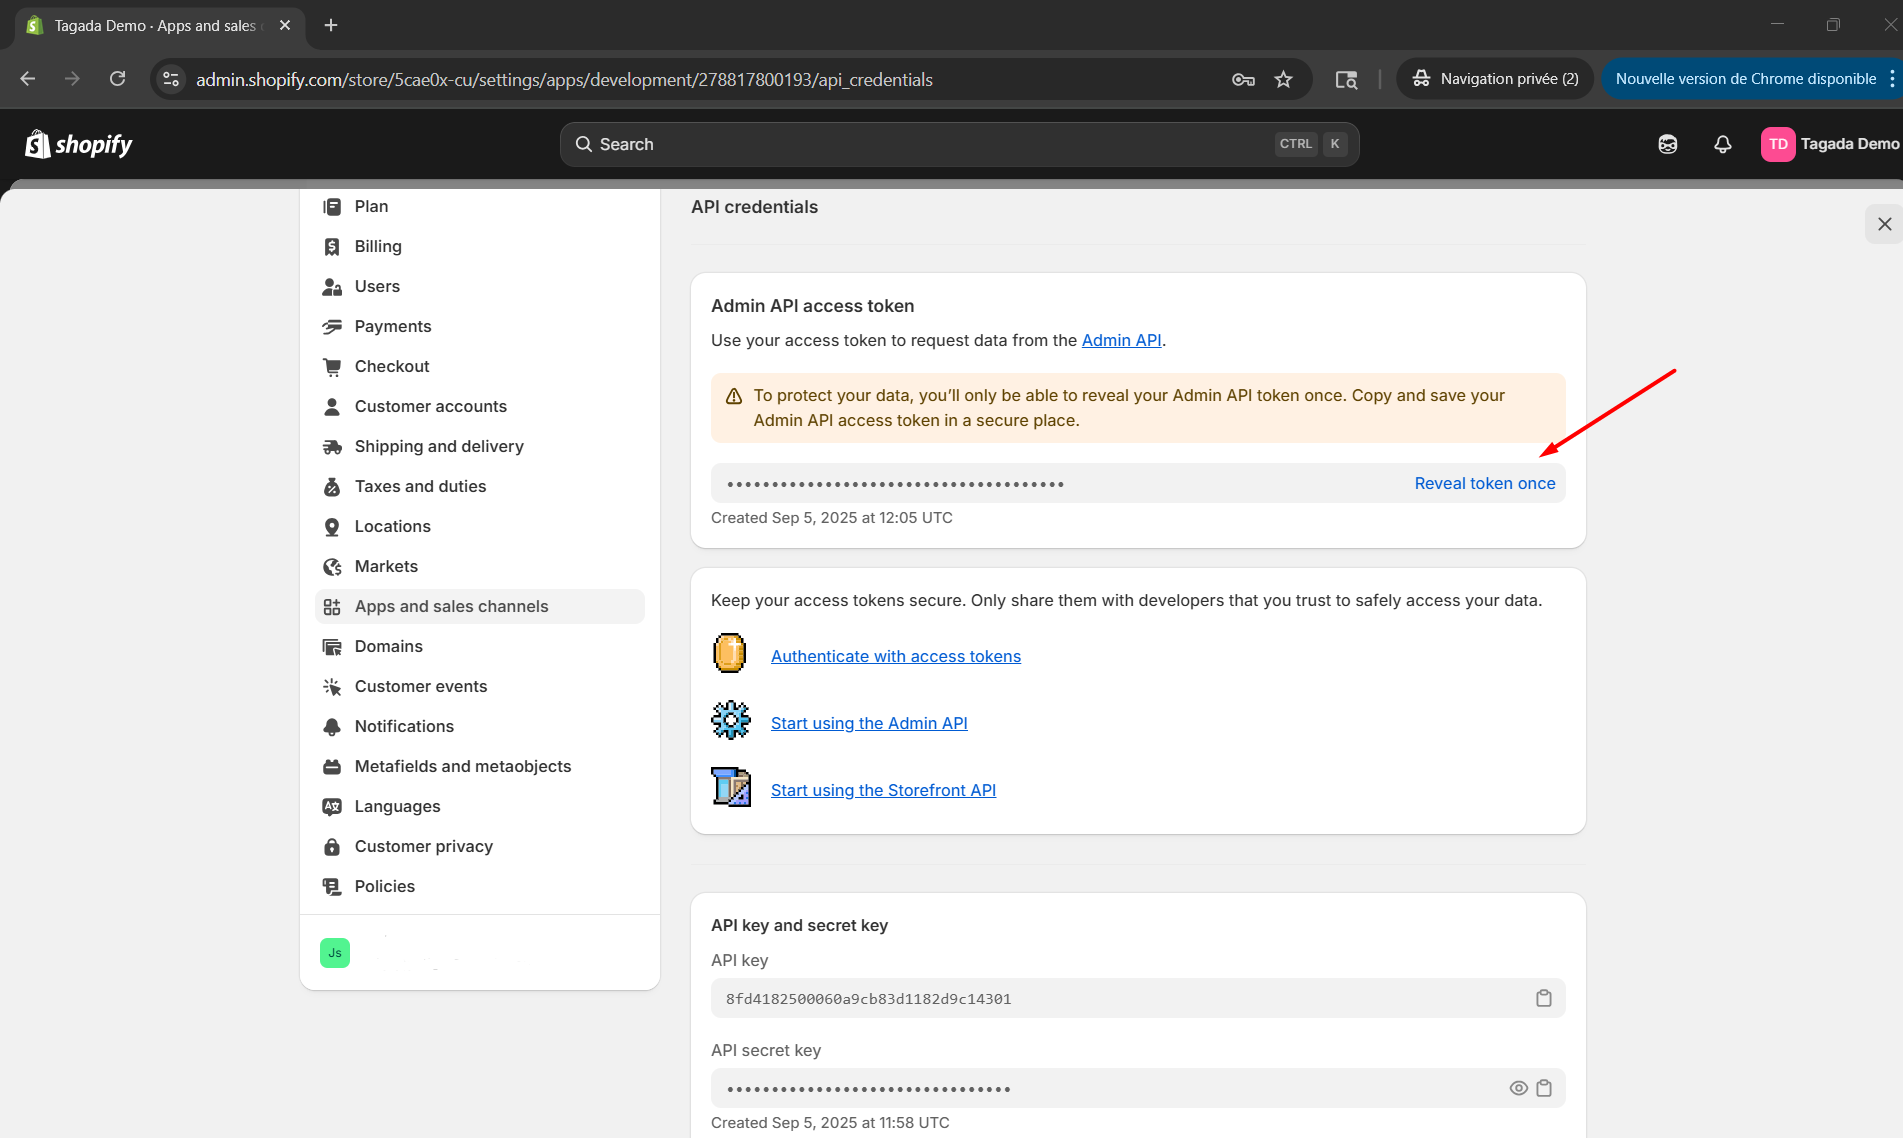
Check the window containing the three keys (credentials) crucial for running the custom app, on API credentials tab
ATTENTION: “Admin API access token” is generated and can be seen (revealed) just once. We highly recommend you to copy-paste it and store it in some secure place (like a digital vault). Or, for example, add it to some doc you use for keeping notes immediately upon seeing (revealing).