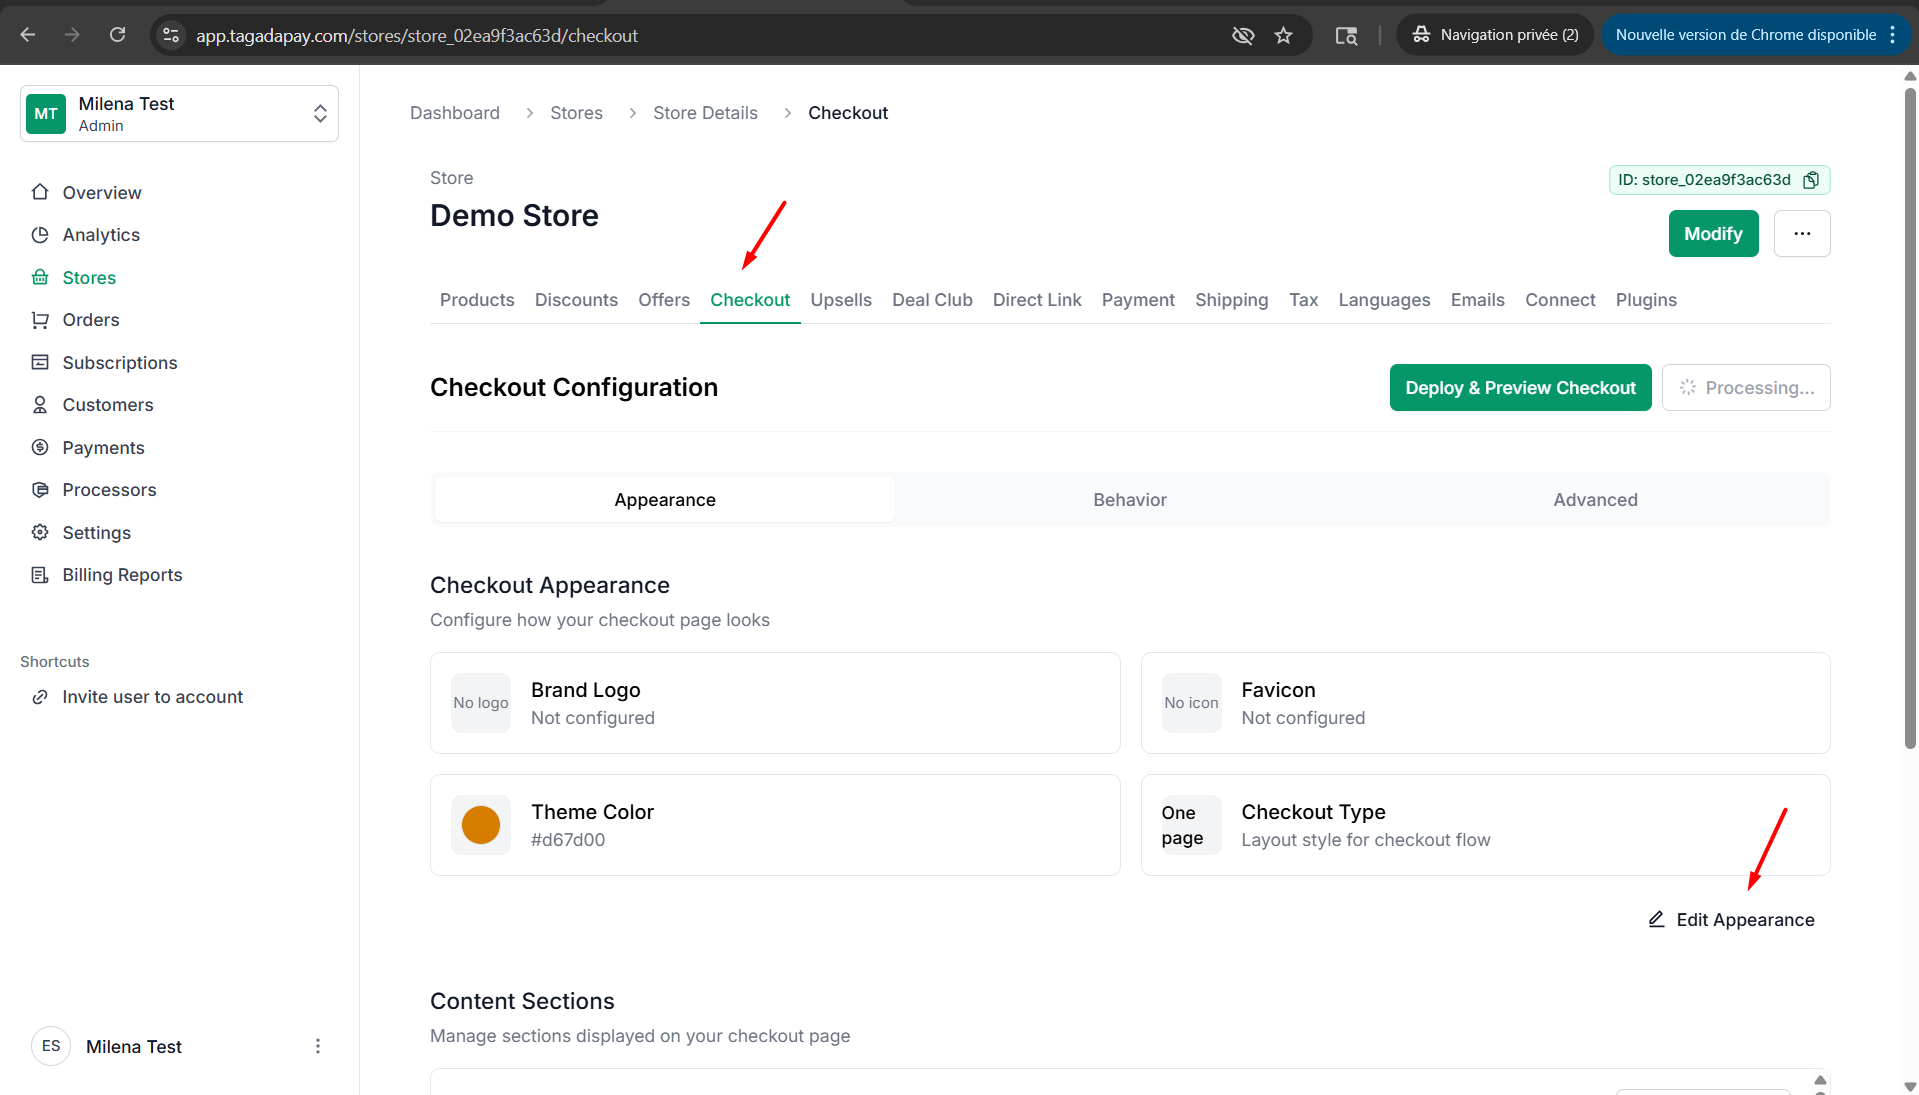
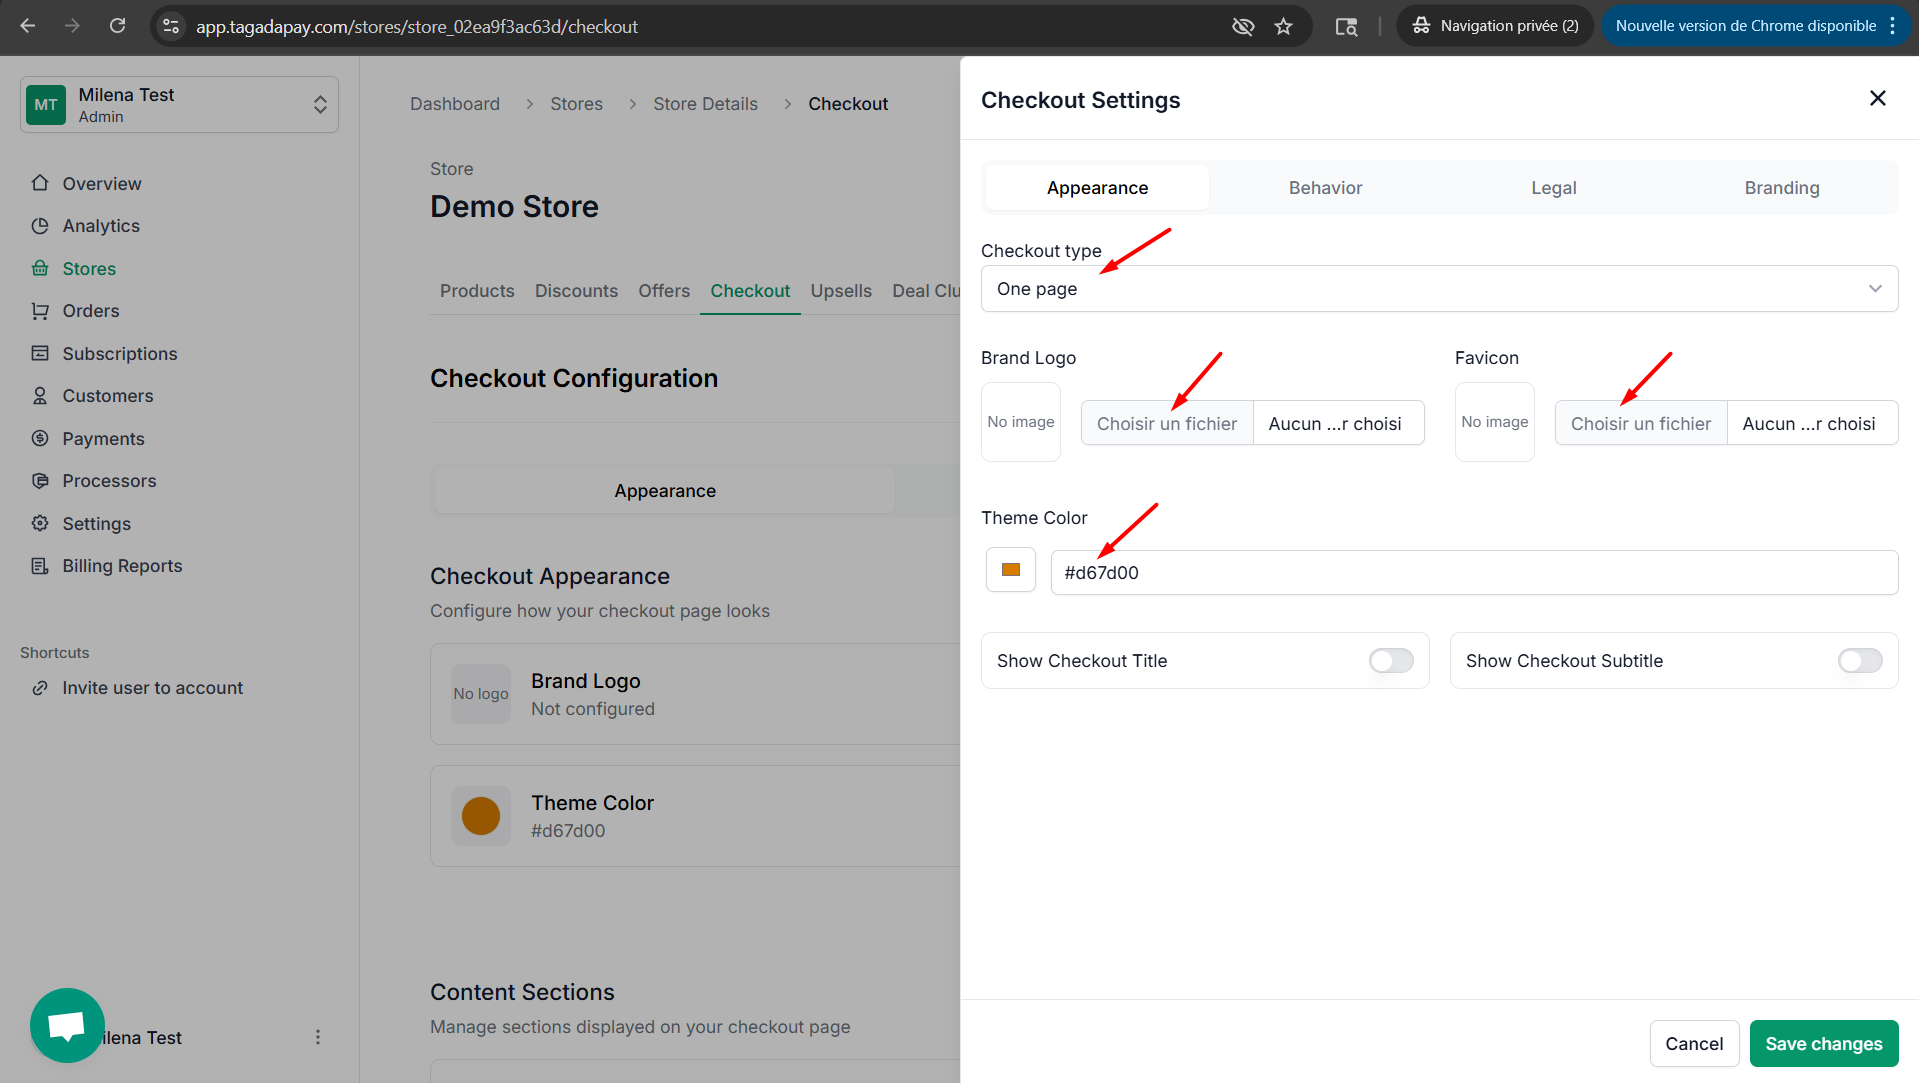
Under Appearance, you can choose between a one-page or multi-page checkout. You’ll also be able to select the logo and favicon that will appear on your checkout, as well as customize the checkout color. Additionally, you have the option to enable or disable the checkout title and subtitle.
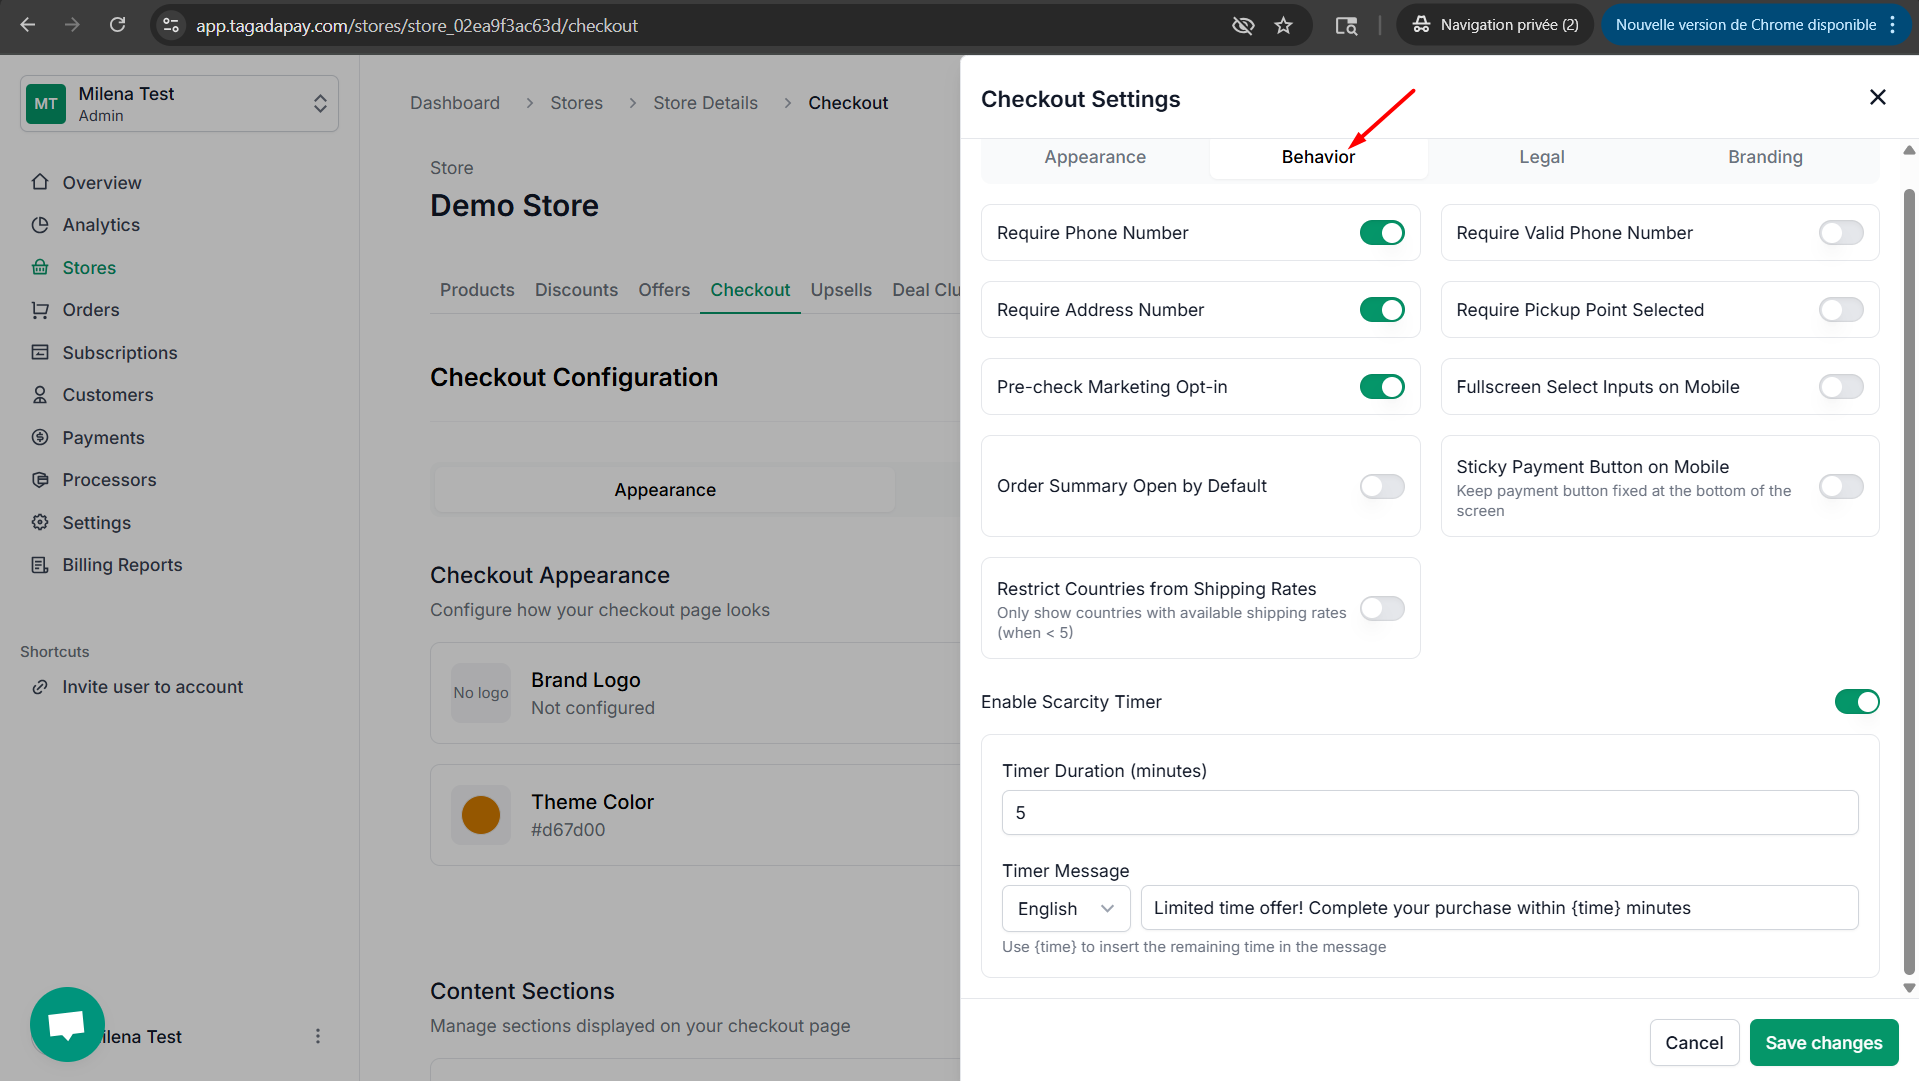
Under the Behavior section, you can choose which fields are required at checkout, such as phone number, address number, etc. You can also enable or disable the pre-checked marketing opt-in and the scarcity timer.
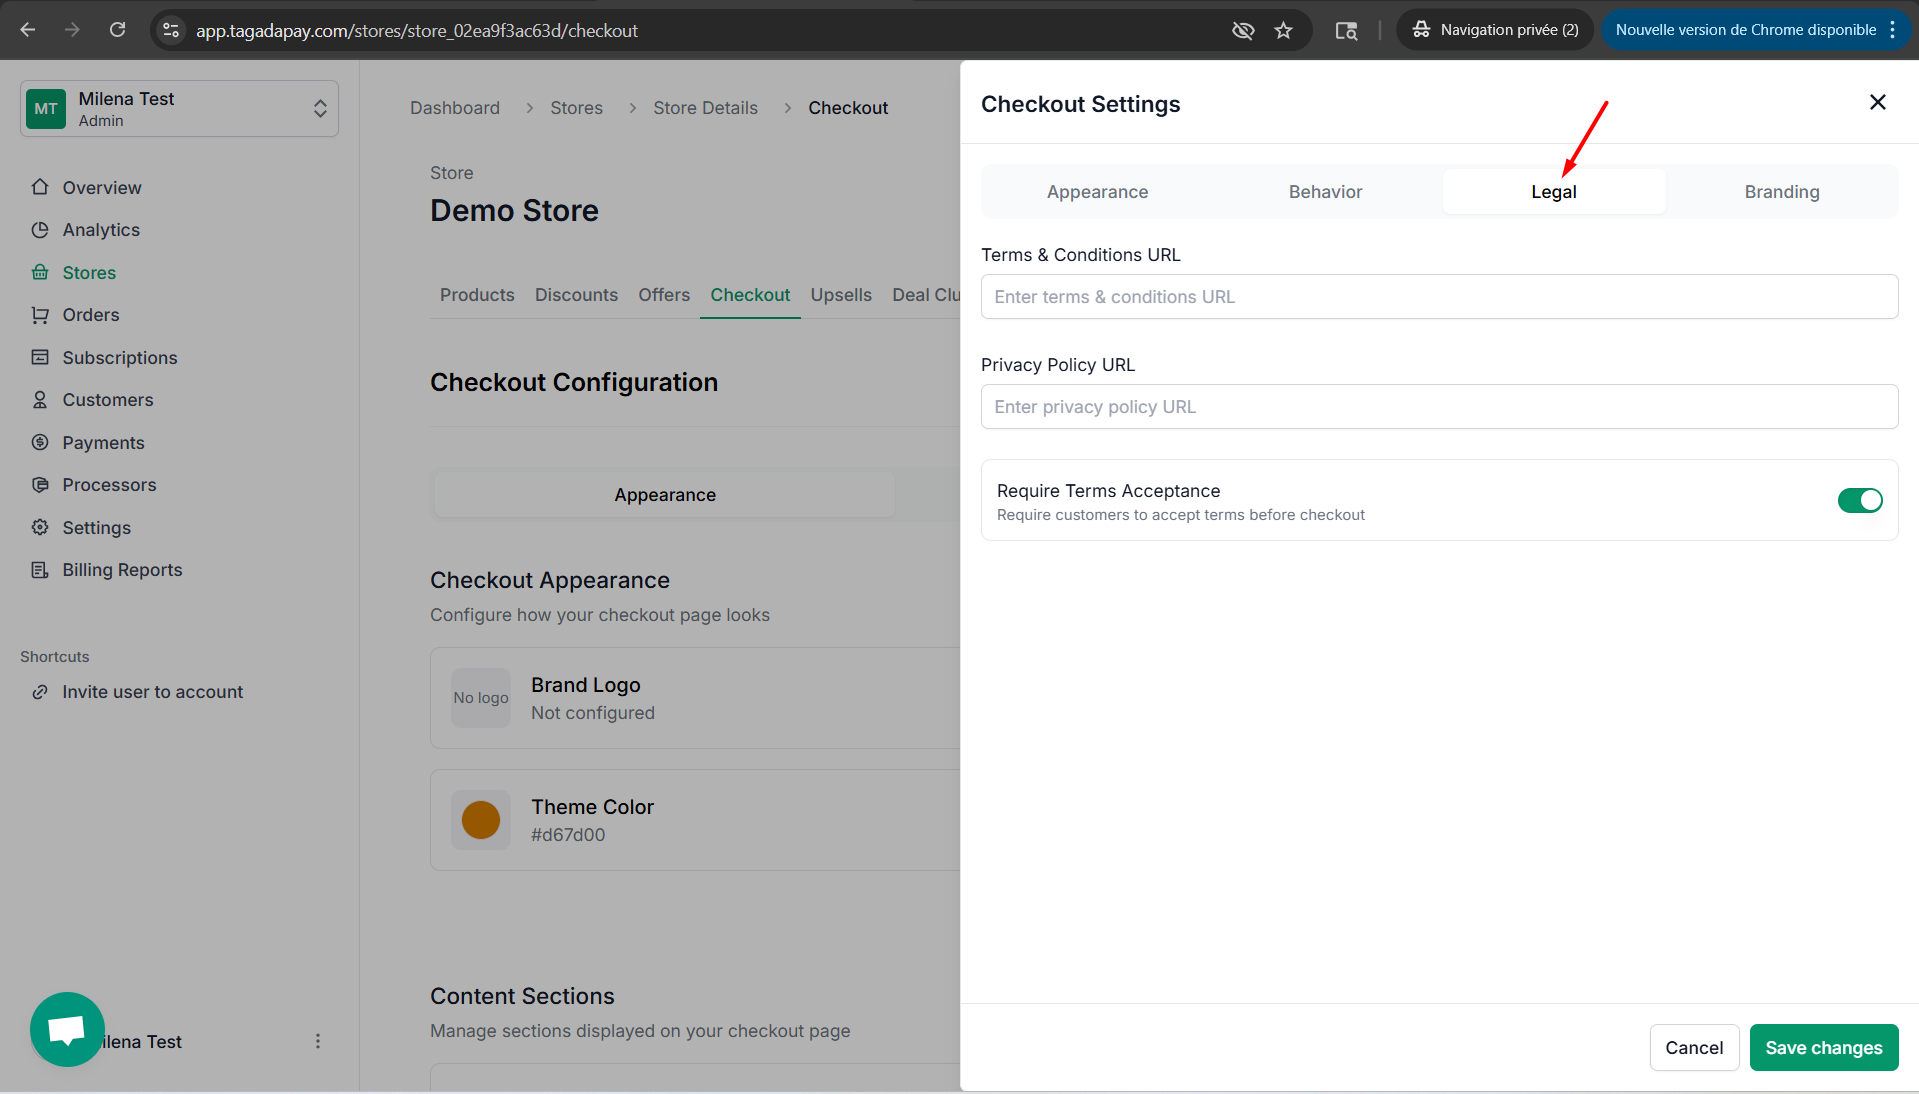
Under the Legal section, you can enter the URLs of your Terms & Conditions and Privacy policy. You can also disable or enable the option to require terms acceptance.5
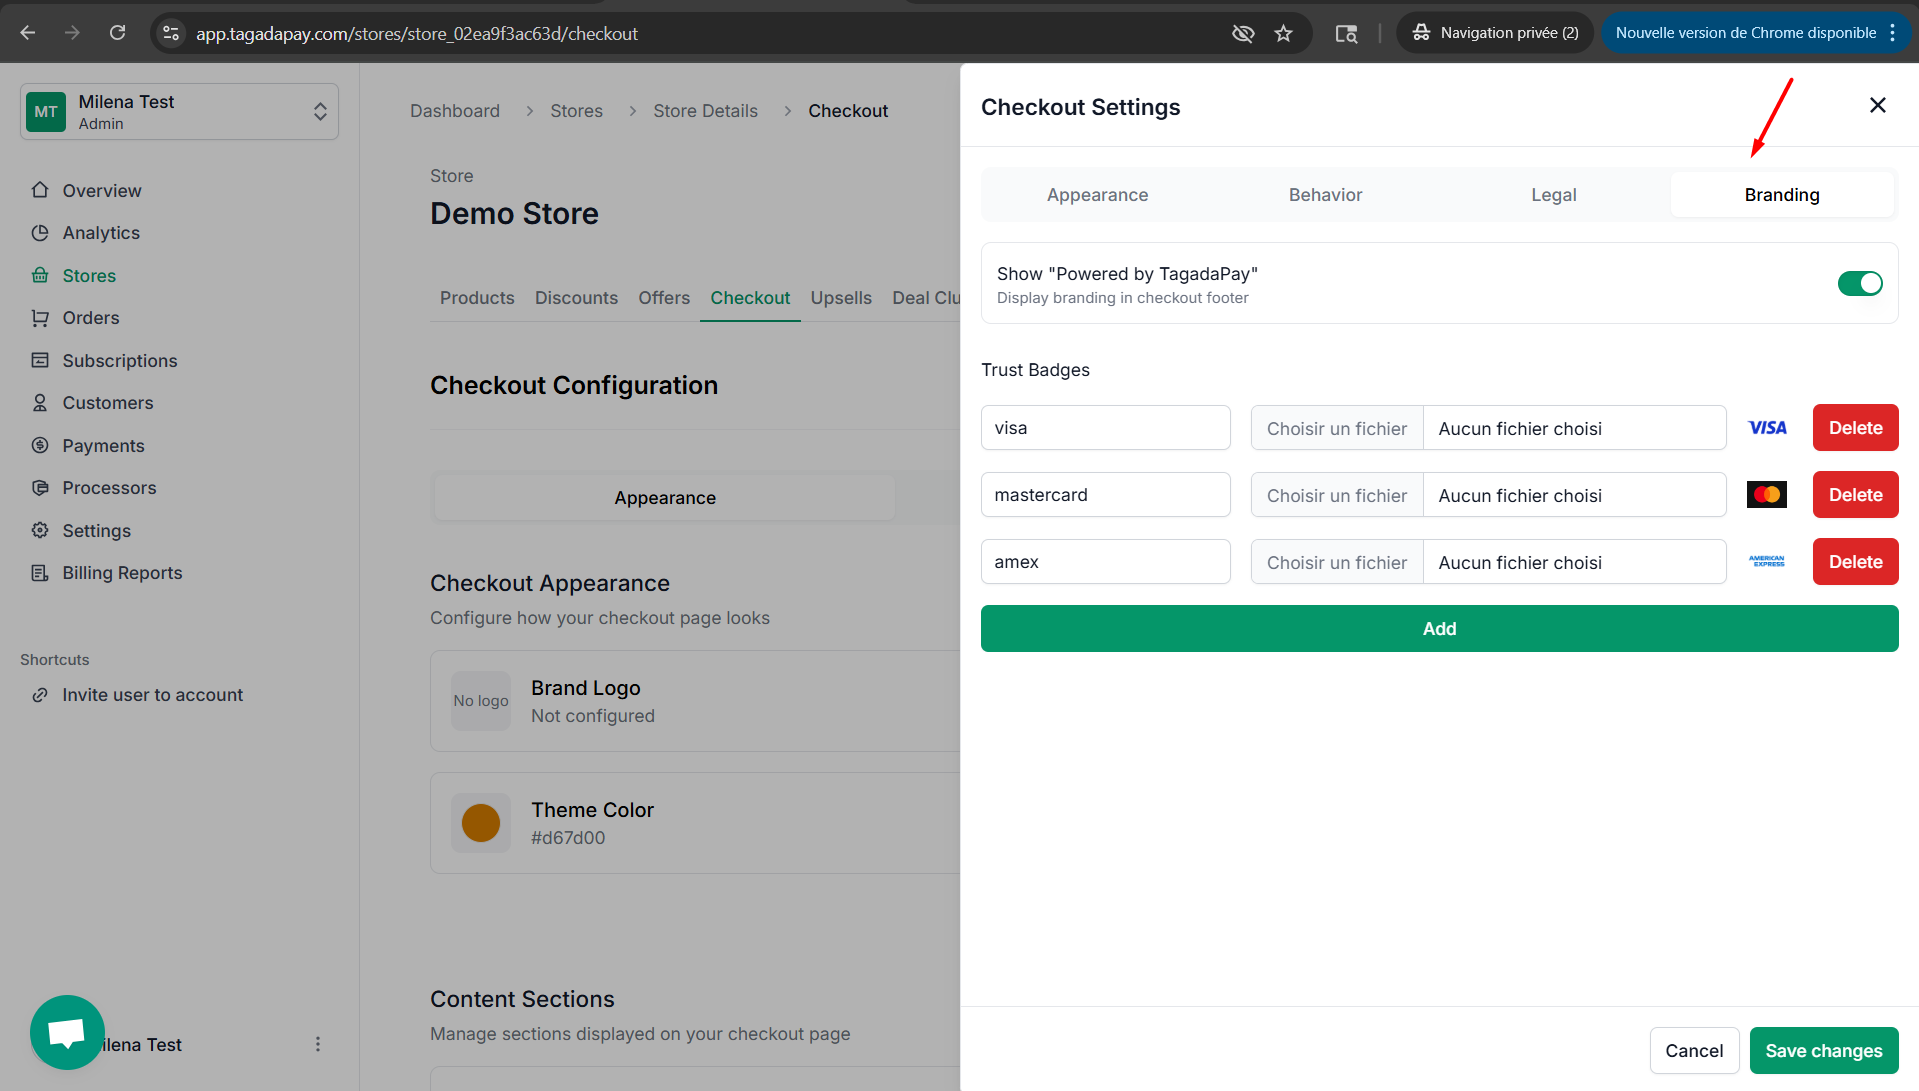
Under the Branding section, you can further customize your checkout by disabling or enabling the ‘Powered by TagadaPay’ option or adding logos for payment methods.