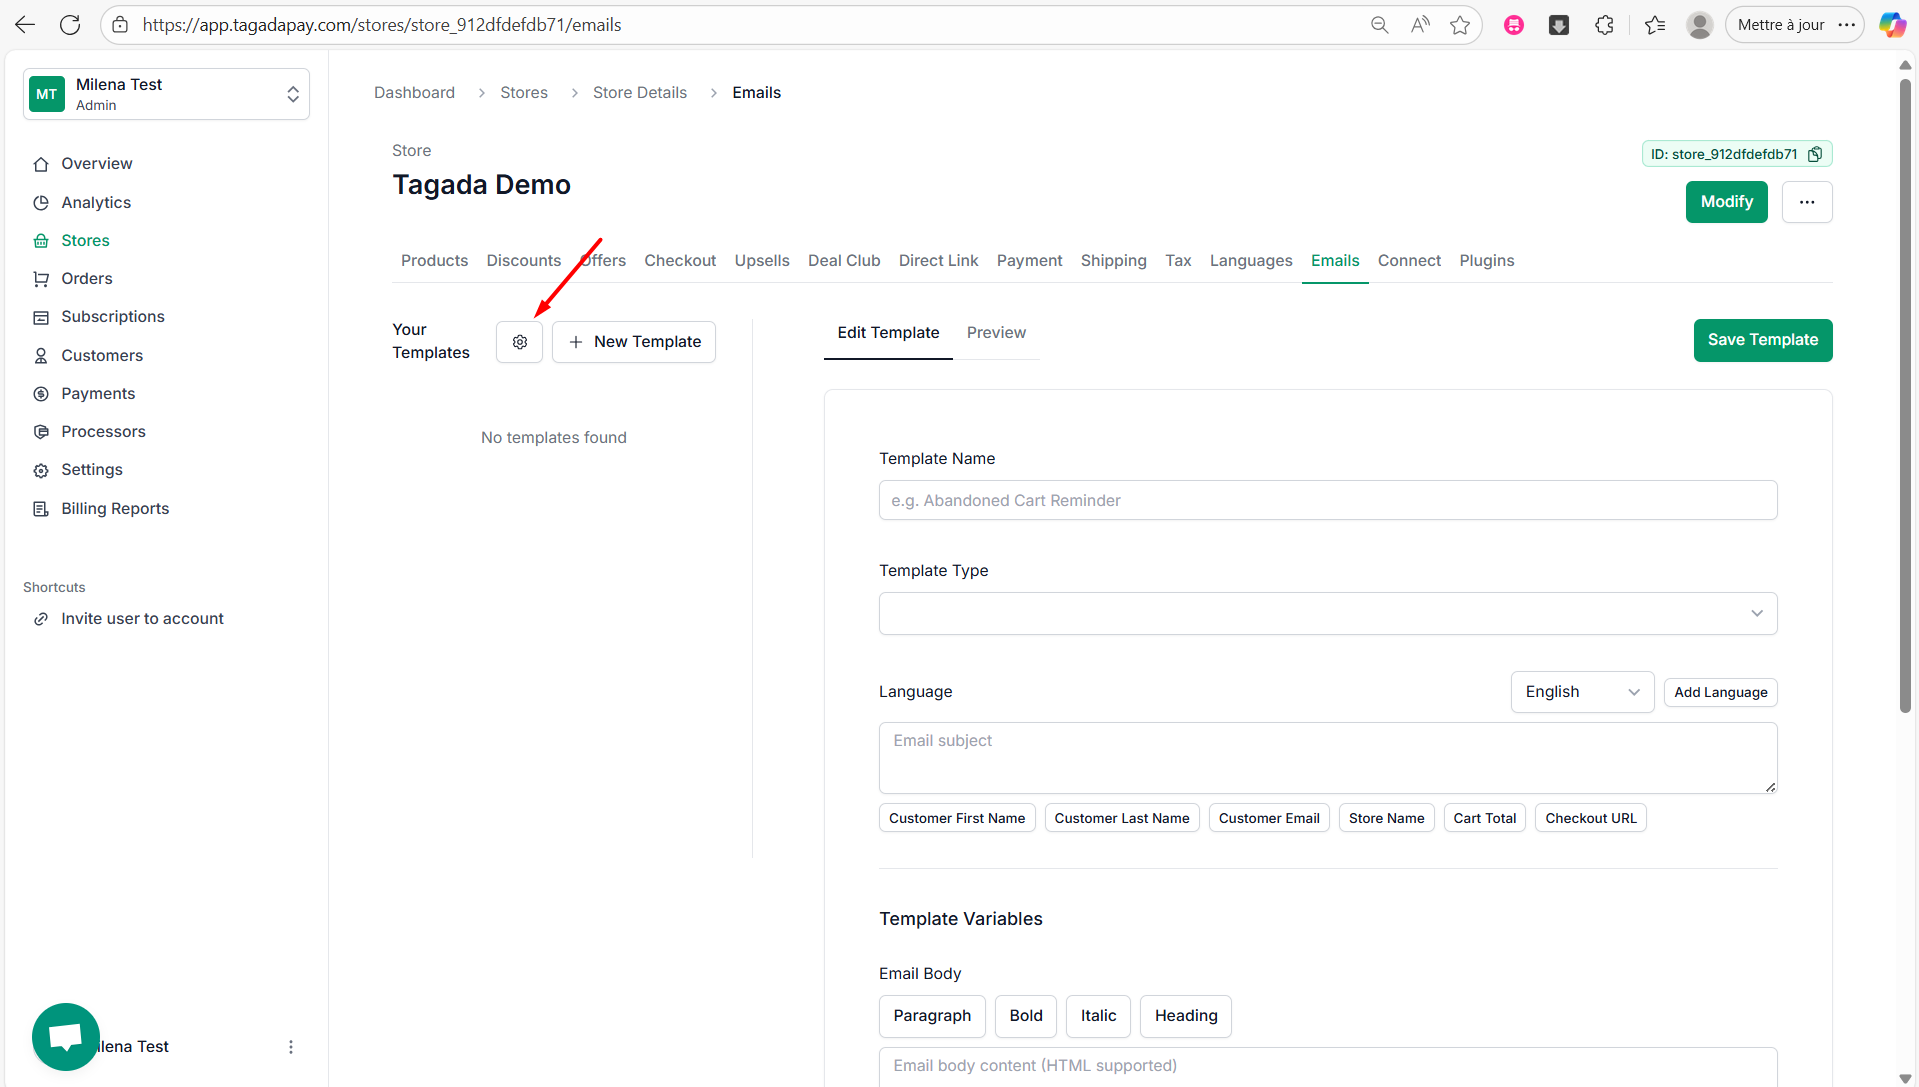
Select the Emails tab in the menu. Then click on Settings to define the domain from which your emails will be sent.
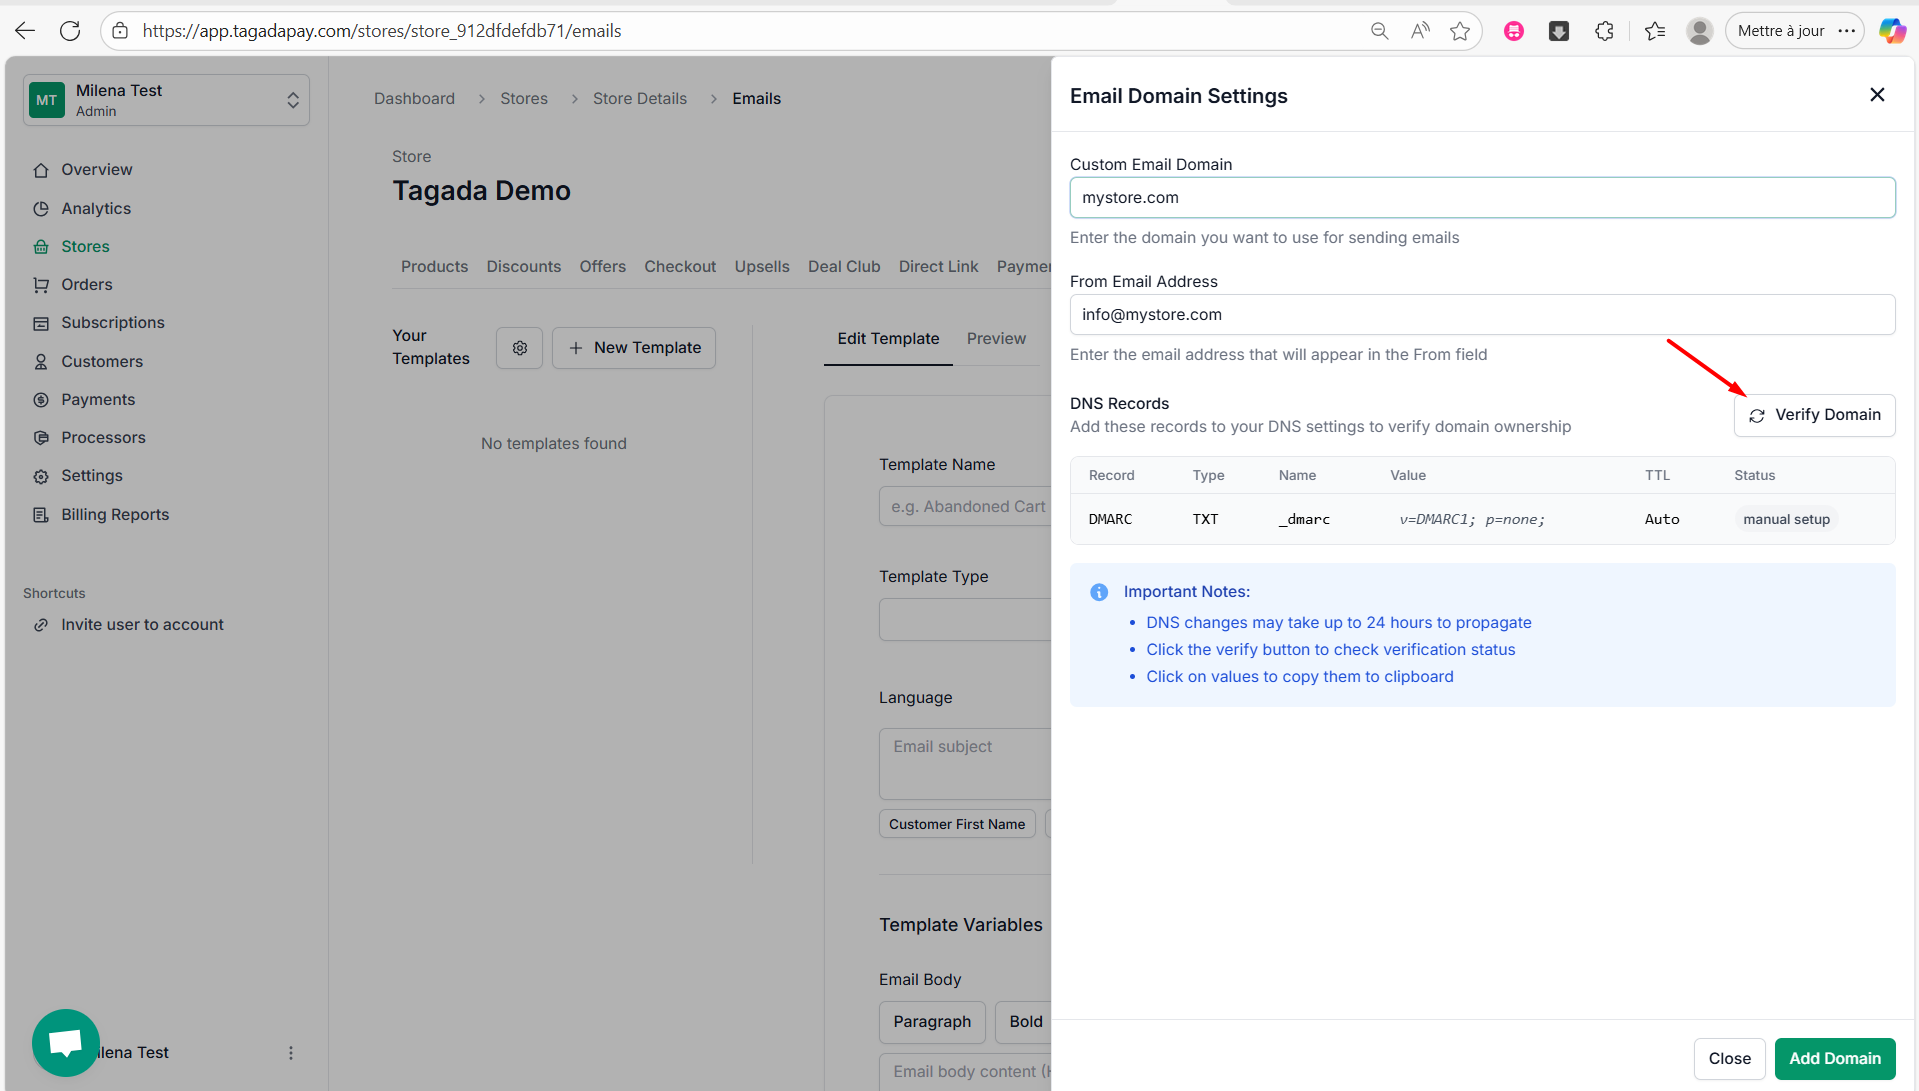
Enter your domain name in the Custom Email Domain field. Then, add your email address in the From Email Address field, for example info@yourdomain.com. You will be required to set up the DNS records as instructed.
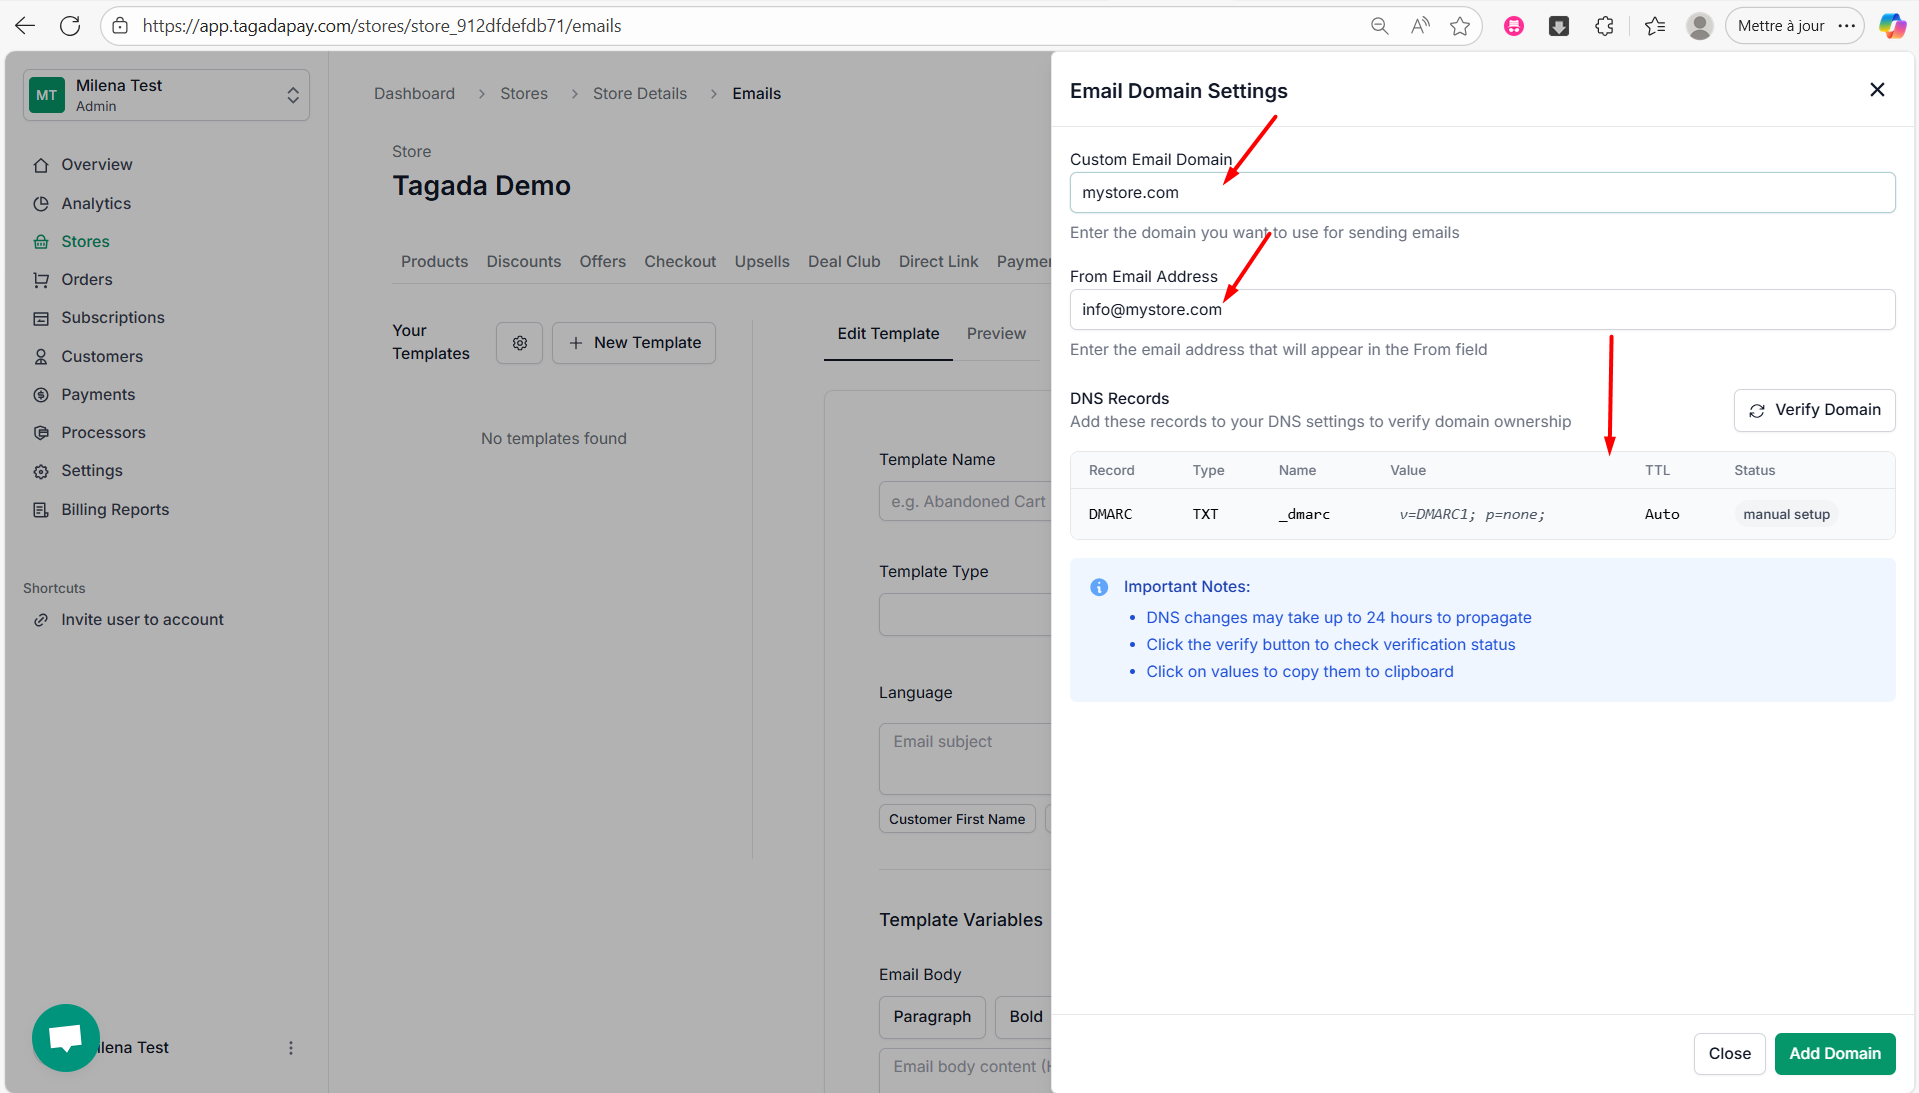
Once you have set up your DNS records as required, click on Verify Domain.