1

Select your desired store under Stores.

image.png
2

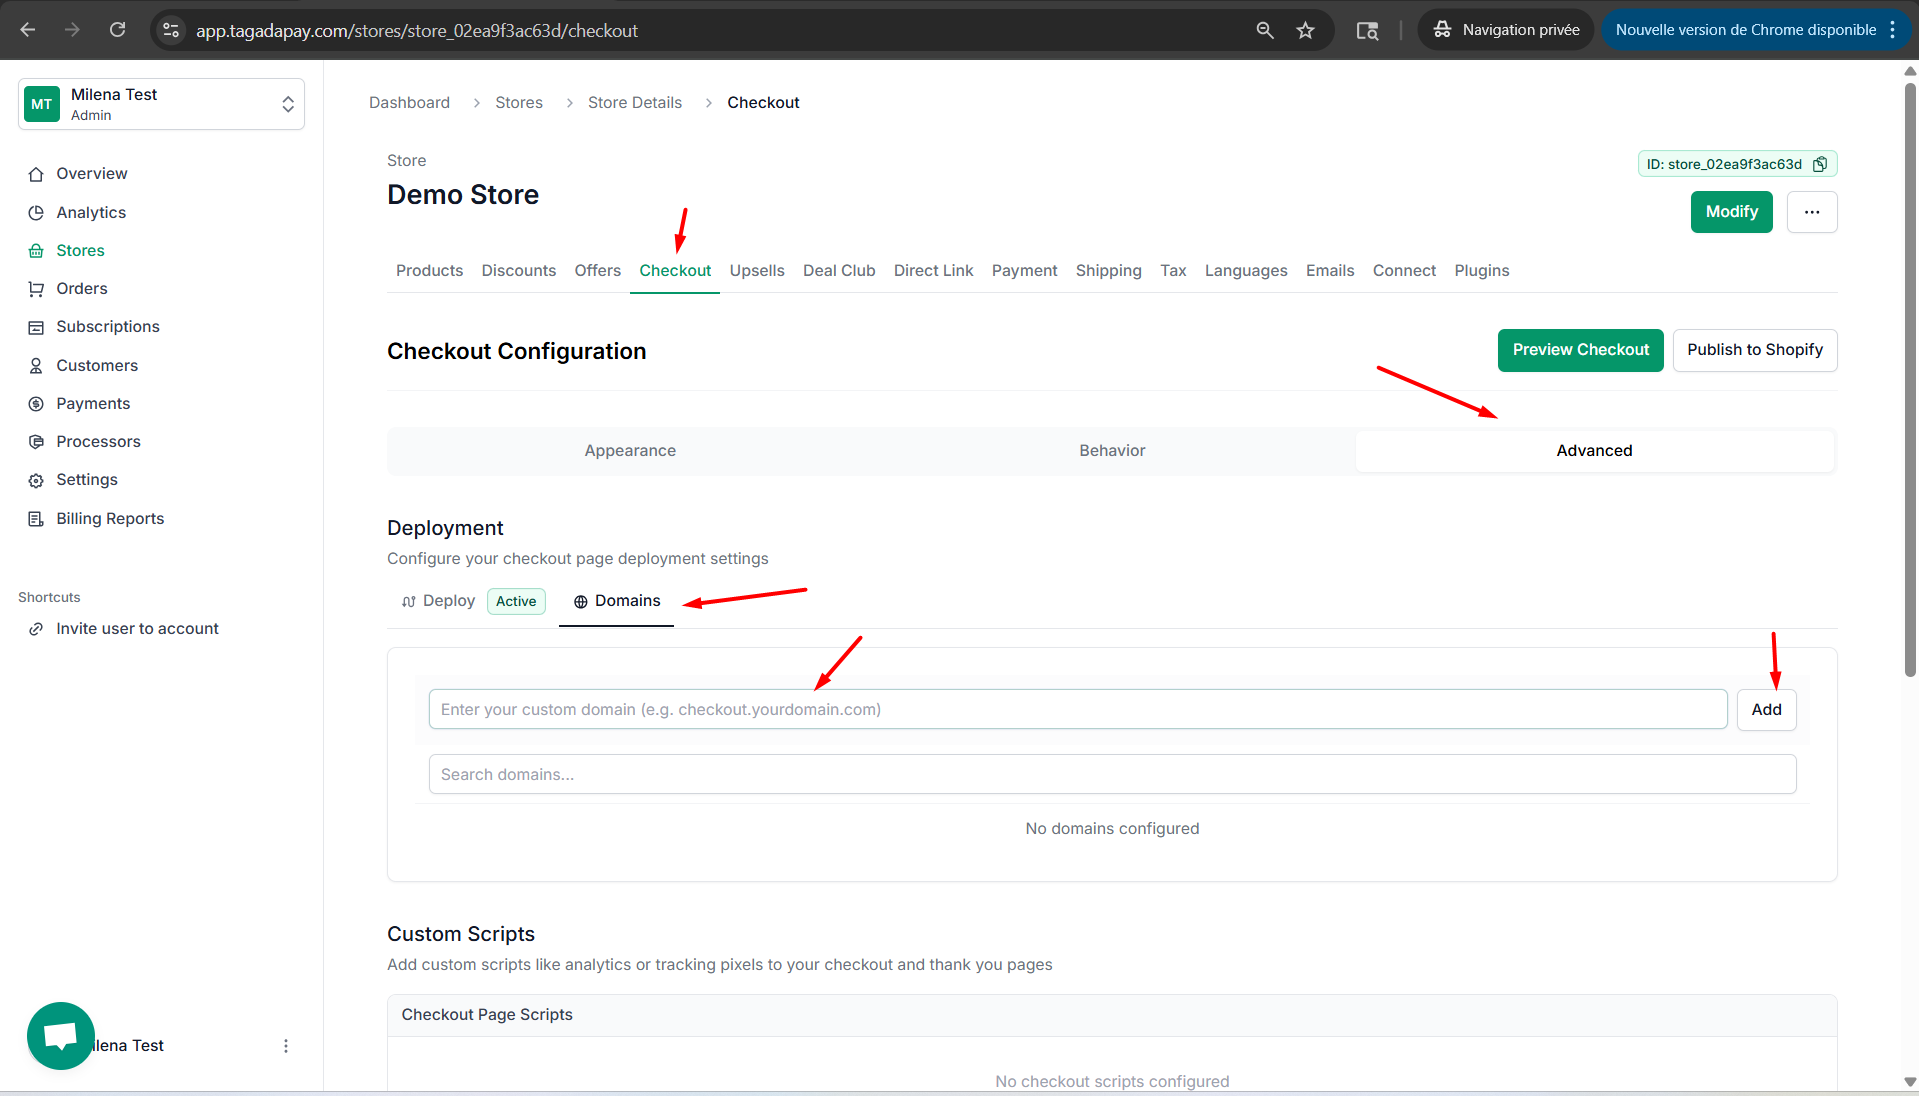
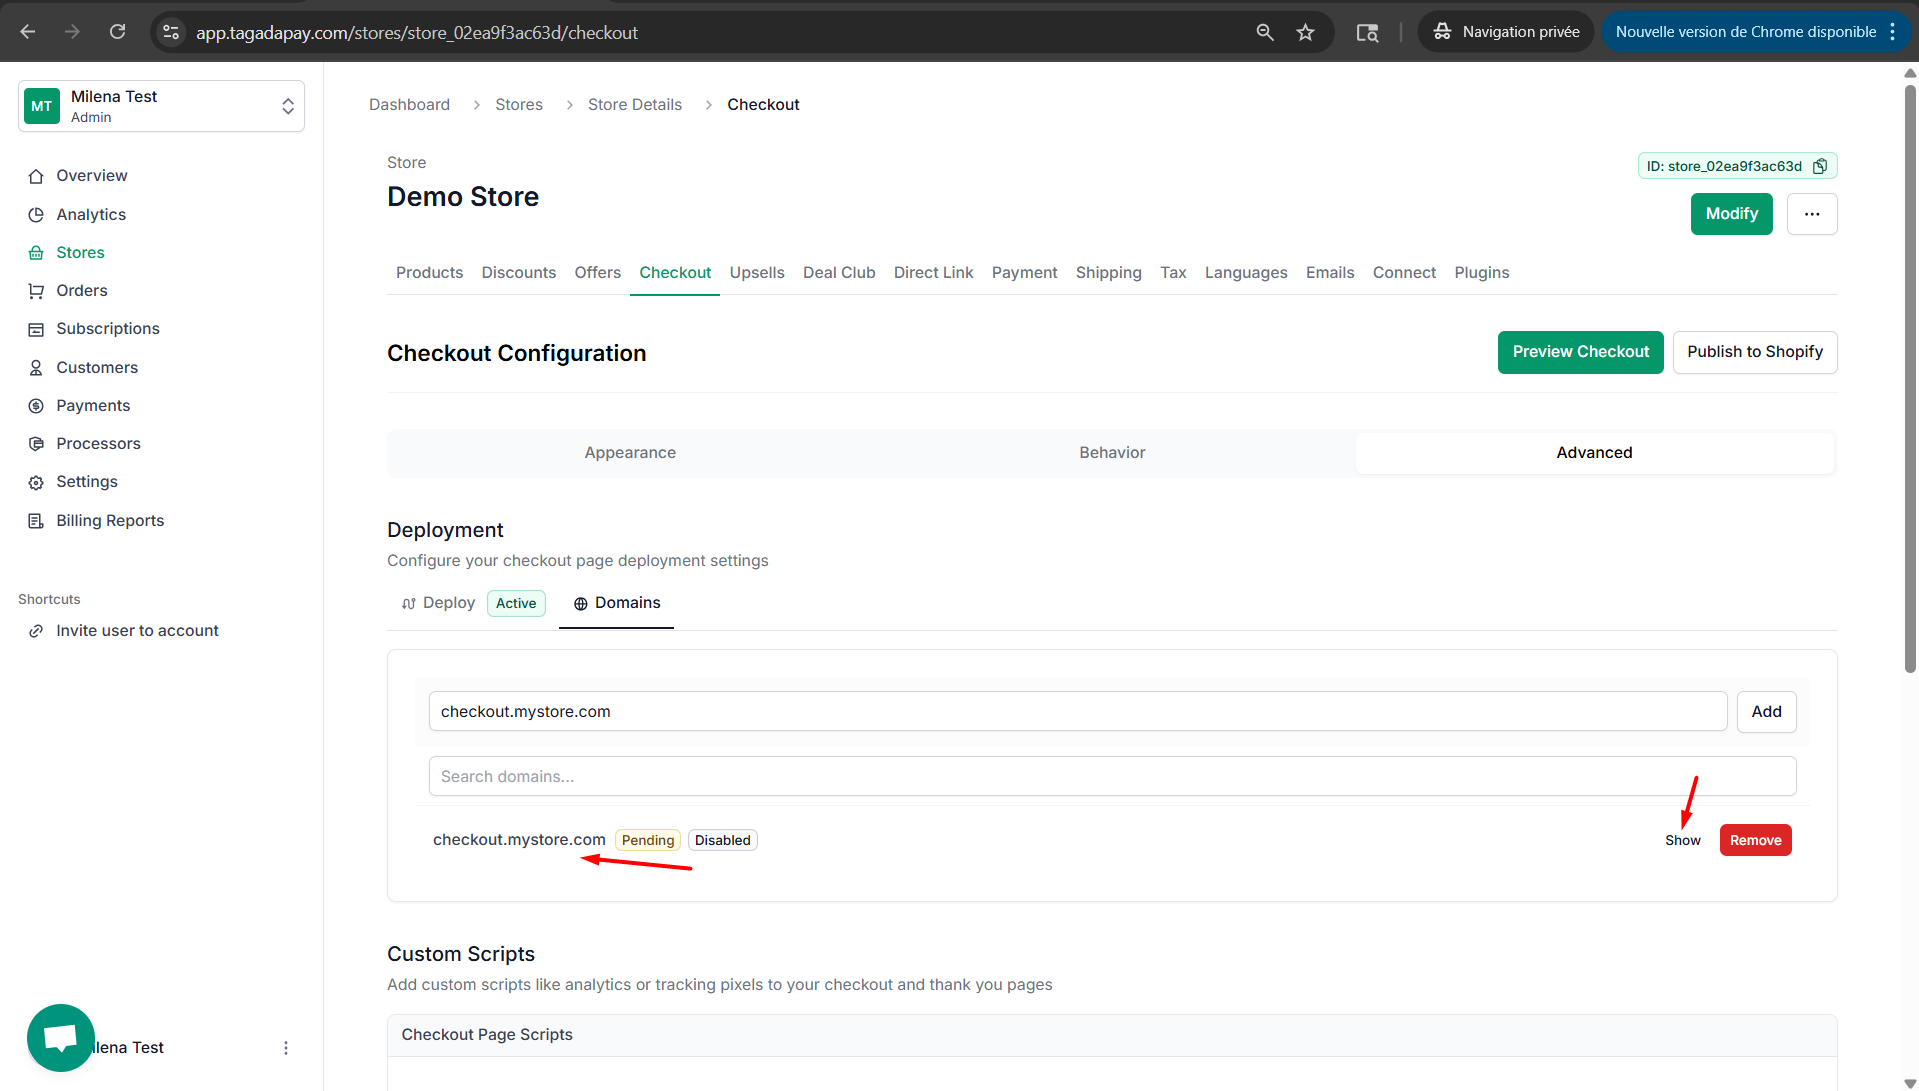
Select Checkout and click on Advanced. Then click on Domains. Enter your desired domain for example checkout.yourstoredomain.com. Then click on Add.

image.png
3

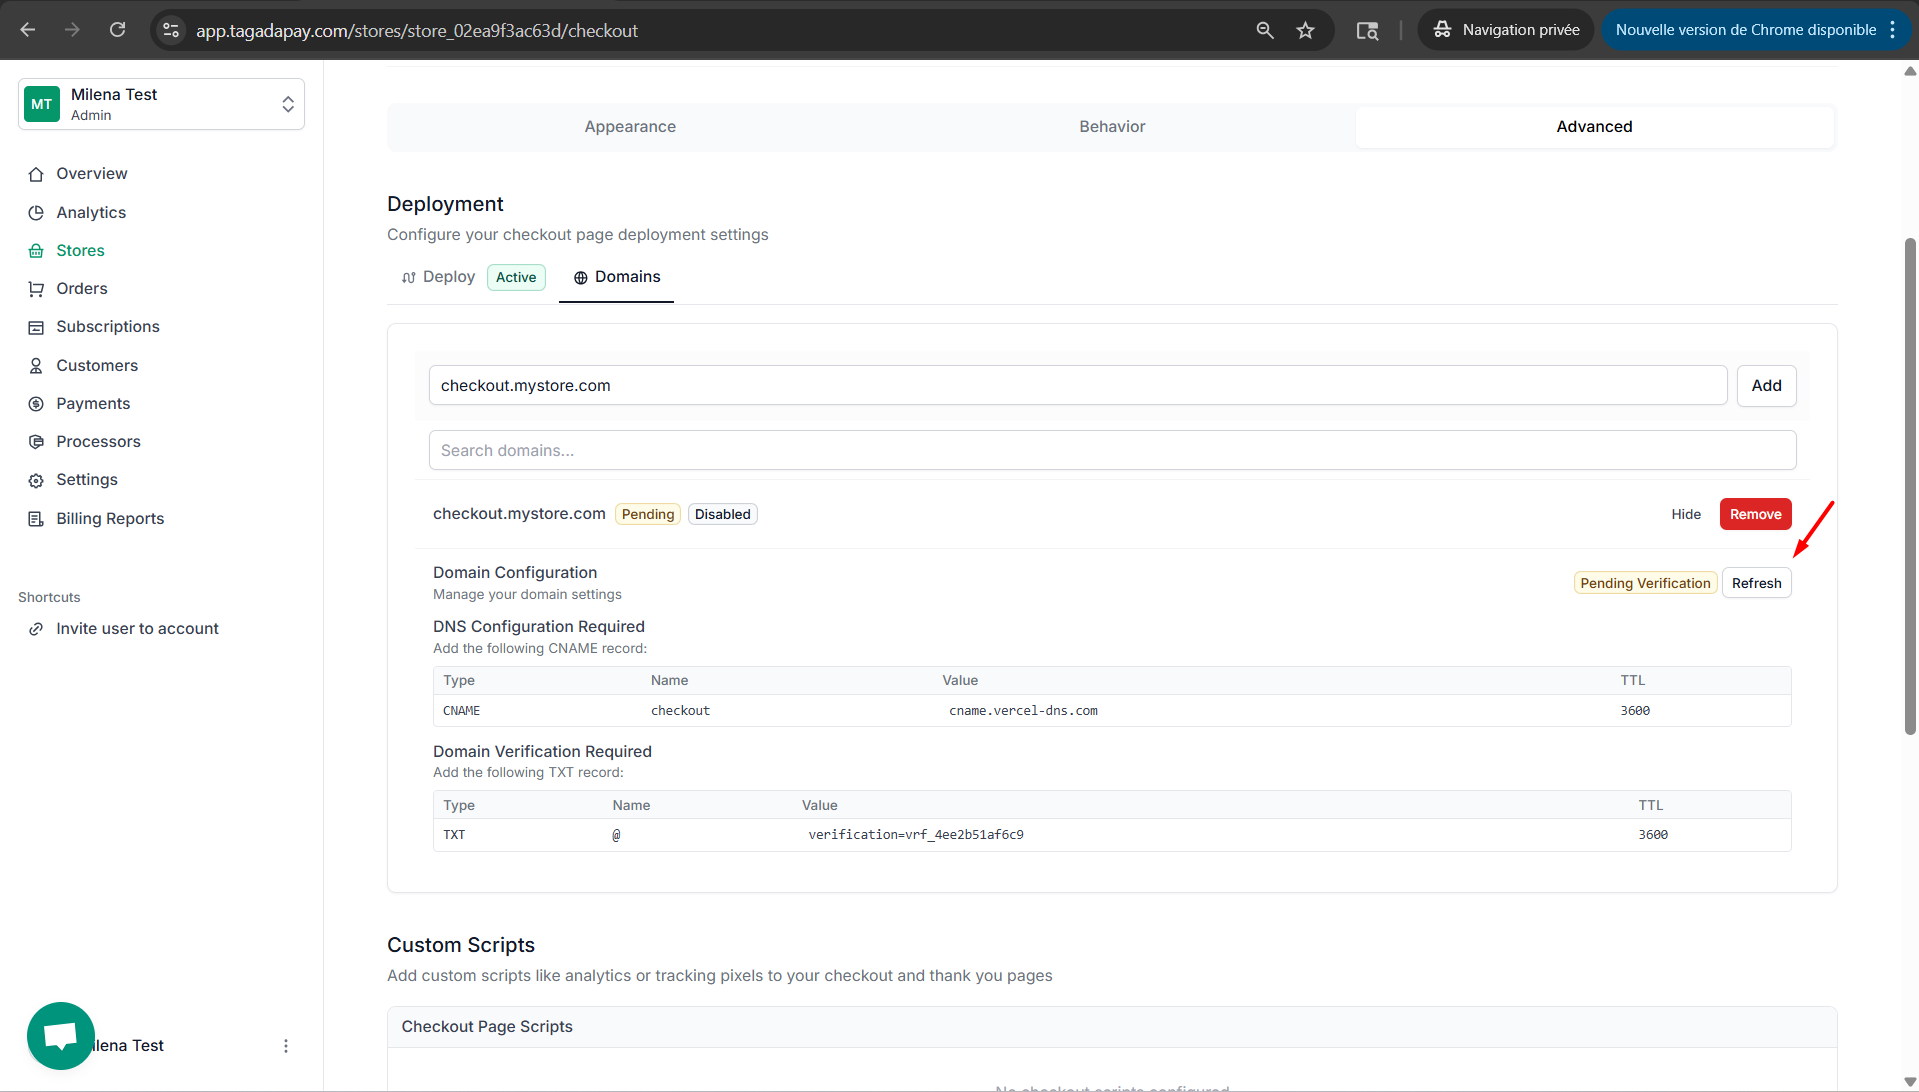
Your checkout domain will appear below and you will be able to see instructions for your DNS settings. Click on Show to see it.

image.png
4

Go to your domain host and edit your domain DNS settings with the instructions shown on your Tagada Admin pannel to add the CNAME and TXT records.

image.pngNote: If you’re using a third-party domain provider, you can find detailed instructions on editing the DNS settings depending on which host you are using:You can learn more about editing the DNS settings for your Shopify managed domain here.You can learn more about editing the DNS settings for your Namecheap domain here.You can learn more about editing the DNS settings for your Hostinger domain here.
5

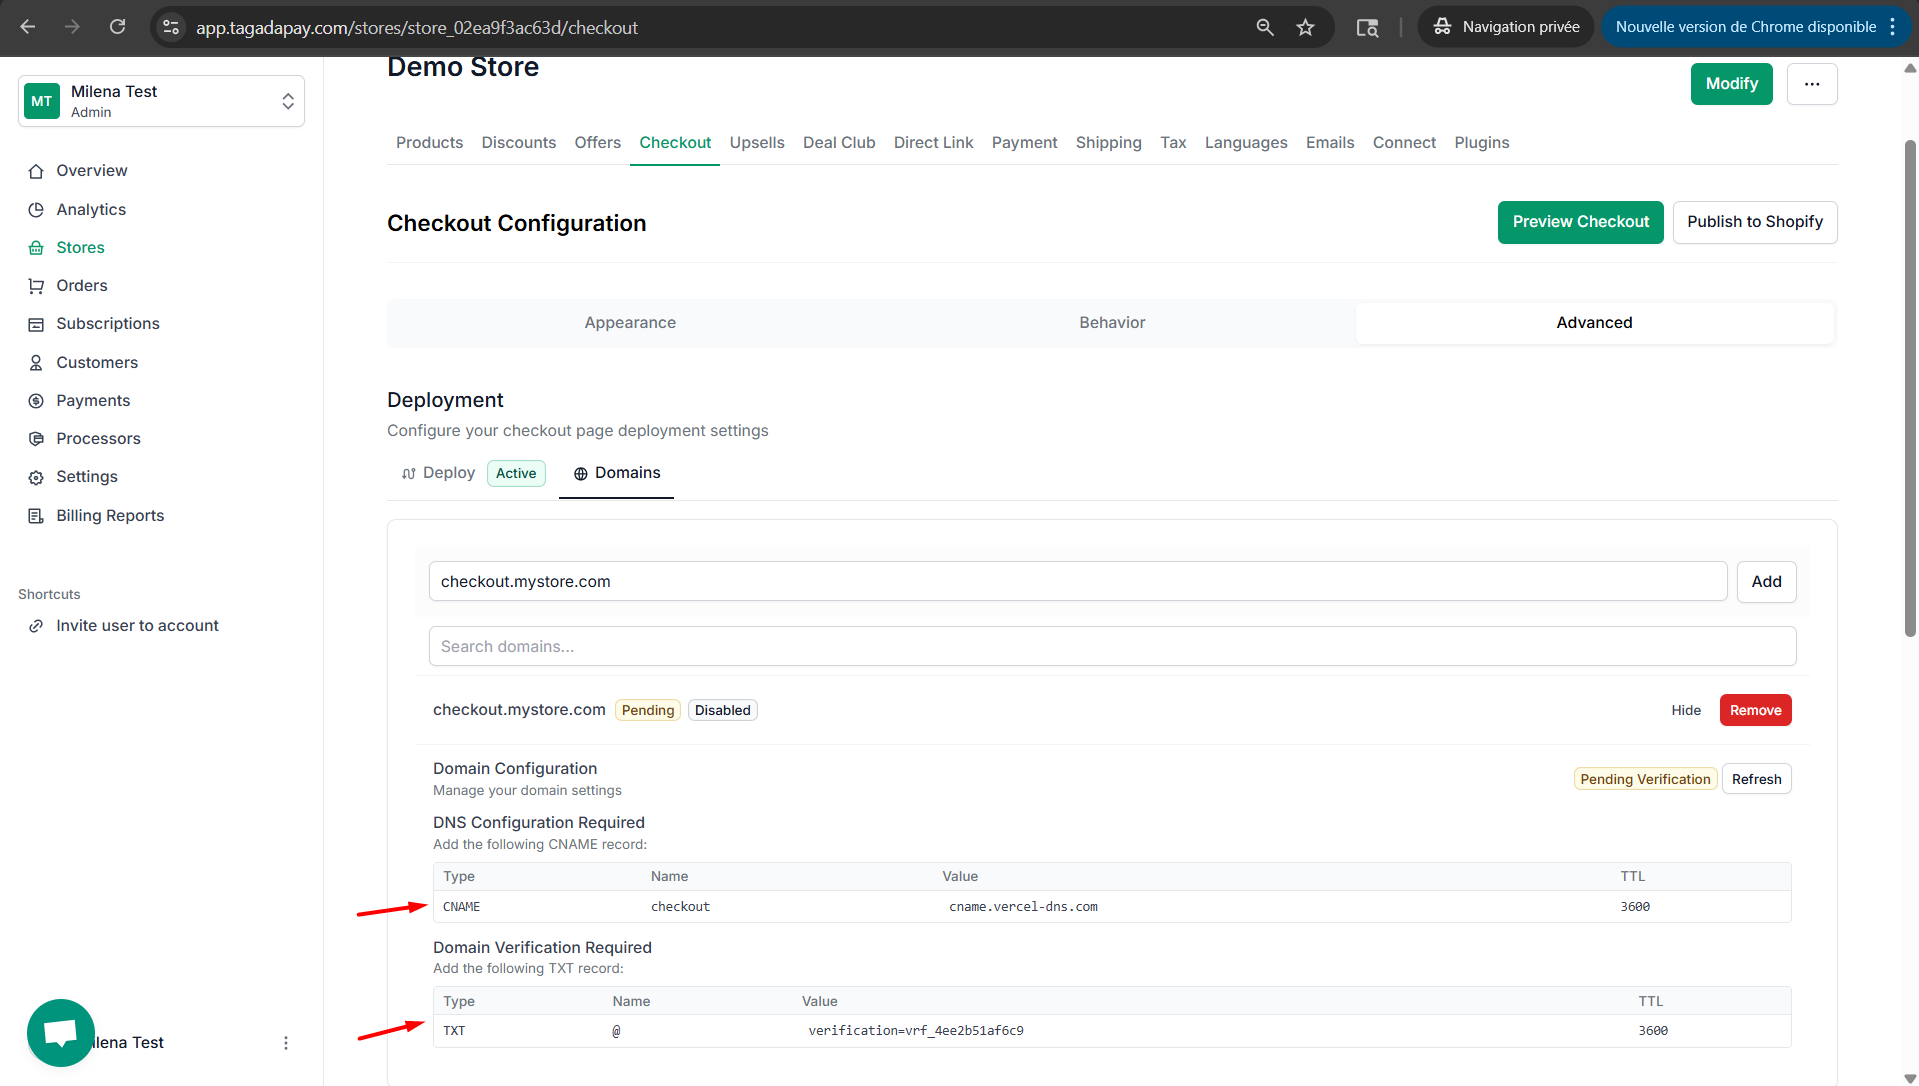
Once you are done with editing the DNS settings with your domain provider, go back to Tagada Admin panel to check the status of your custom domain. If the status is still Pending, you can click on Refresh.

image.png
6

Once the status shows as Valid configuration, it means your checkout custom domain has been successfully configured.

In the next chapter you will be able to learn how to deploy your custom domain.
You can add a custom domain for your checkout. Note: Always unpublish and undeploy your chekout first before adding a custom domain.